Before you skip out the door for a little winter vacation, try to take 10 minutes to ponder the actions you can take in the new year to make your business more efficient, more beloved by customers, and more profitable. Whether you’ve got a long list of must-dos or are scratching your head, we’ve got one for you to consider: Download the Waitlist Me app.
Have nary a clue as to how one app can revolutionize your business in 2018? Here’s exactly how Waitlist Me will help make your business goals more achievable this year.
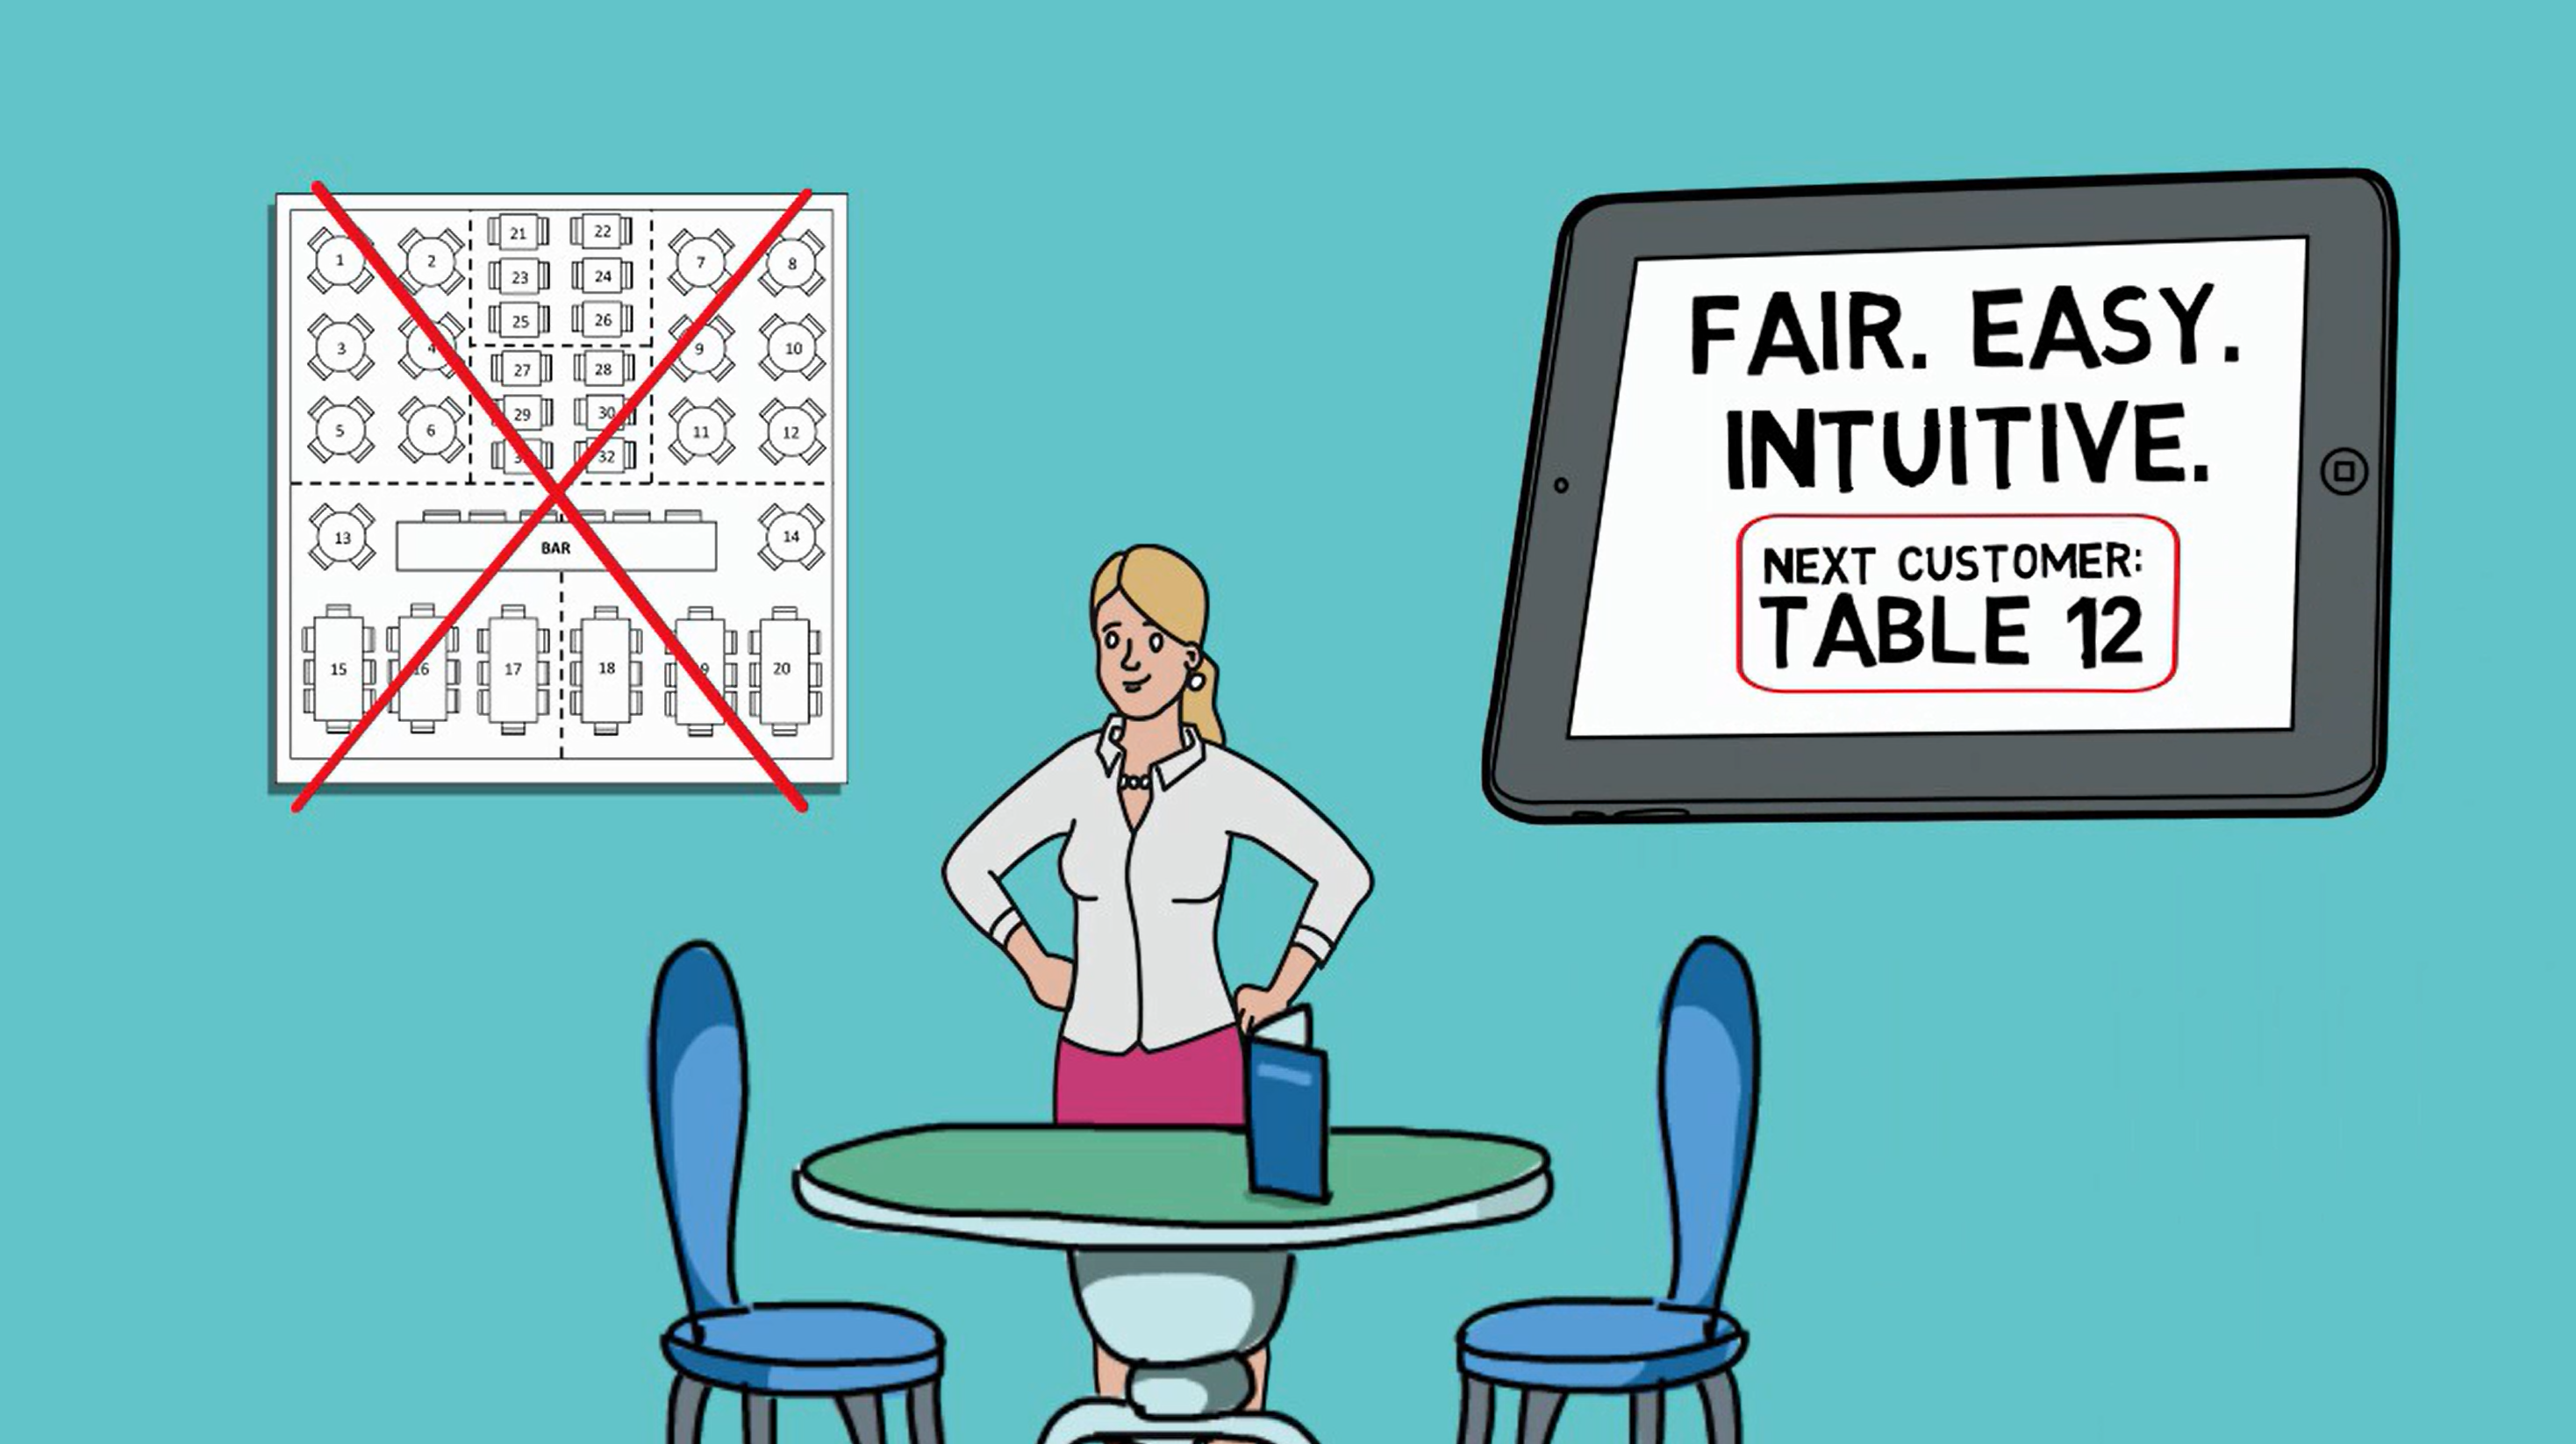
Resolution #1: Simplify your waitlist system
Forget grease pens and messy paper planners. Waitlist Me’s signature waitlist feature nixes hostess stand clutter. Now, your front-of-house staff can see your business’ waitlist in a single glance and add customers to it with a swipe.
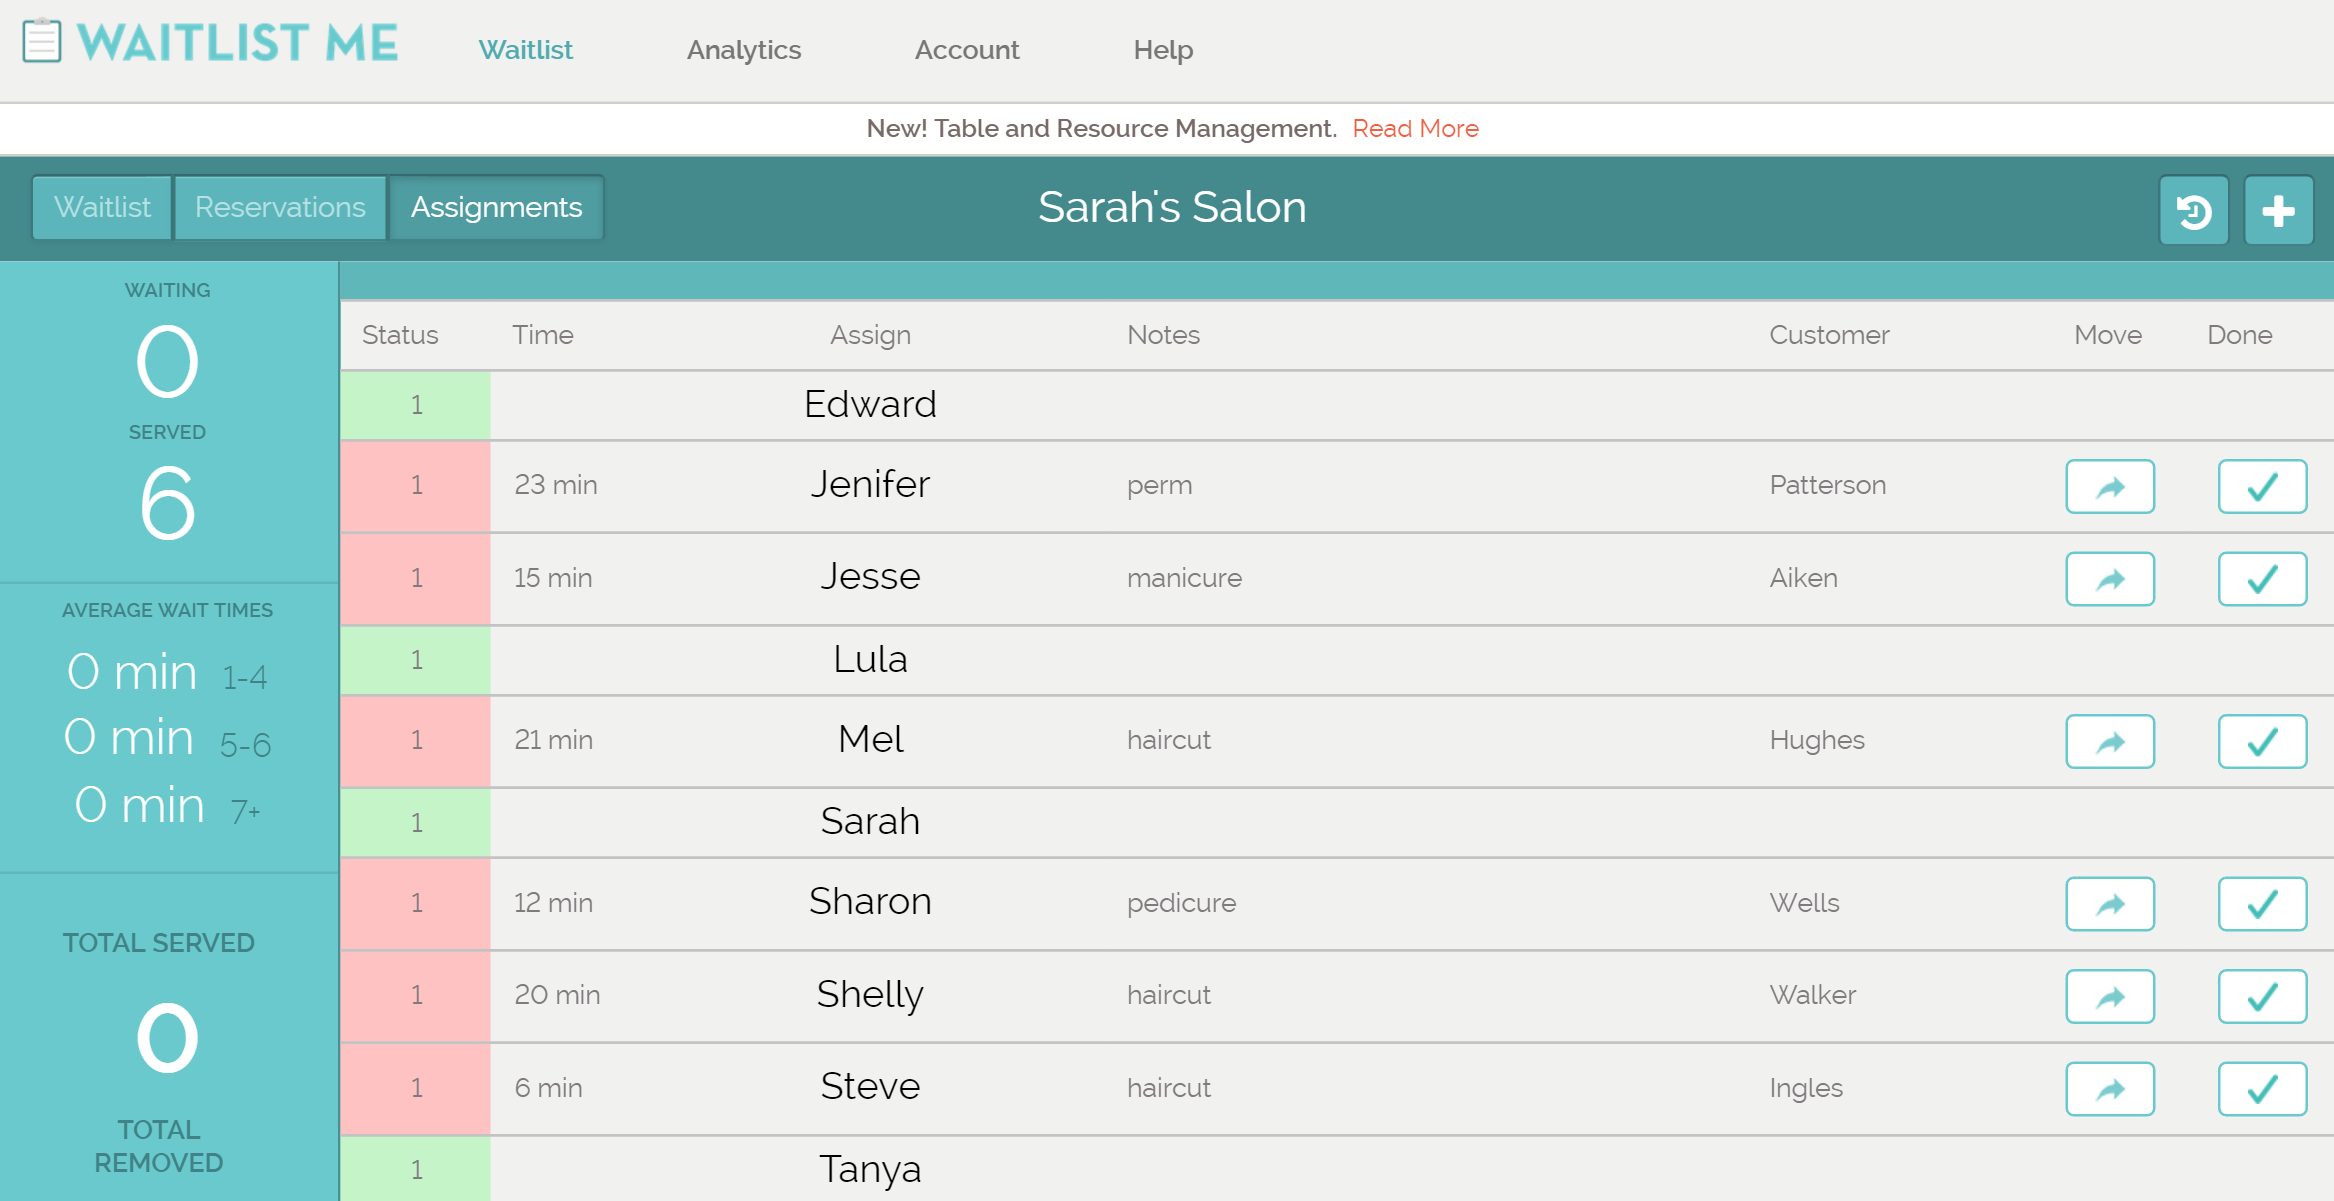
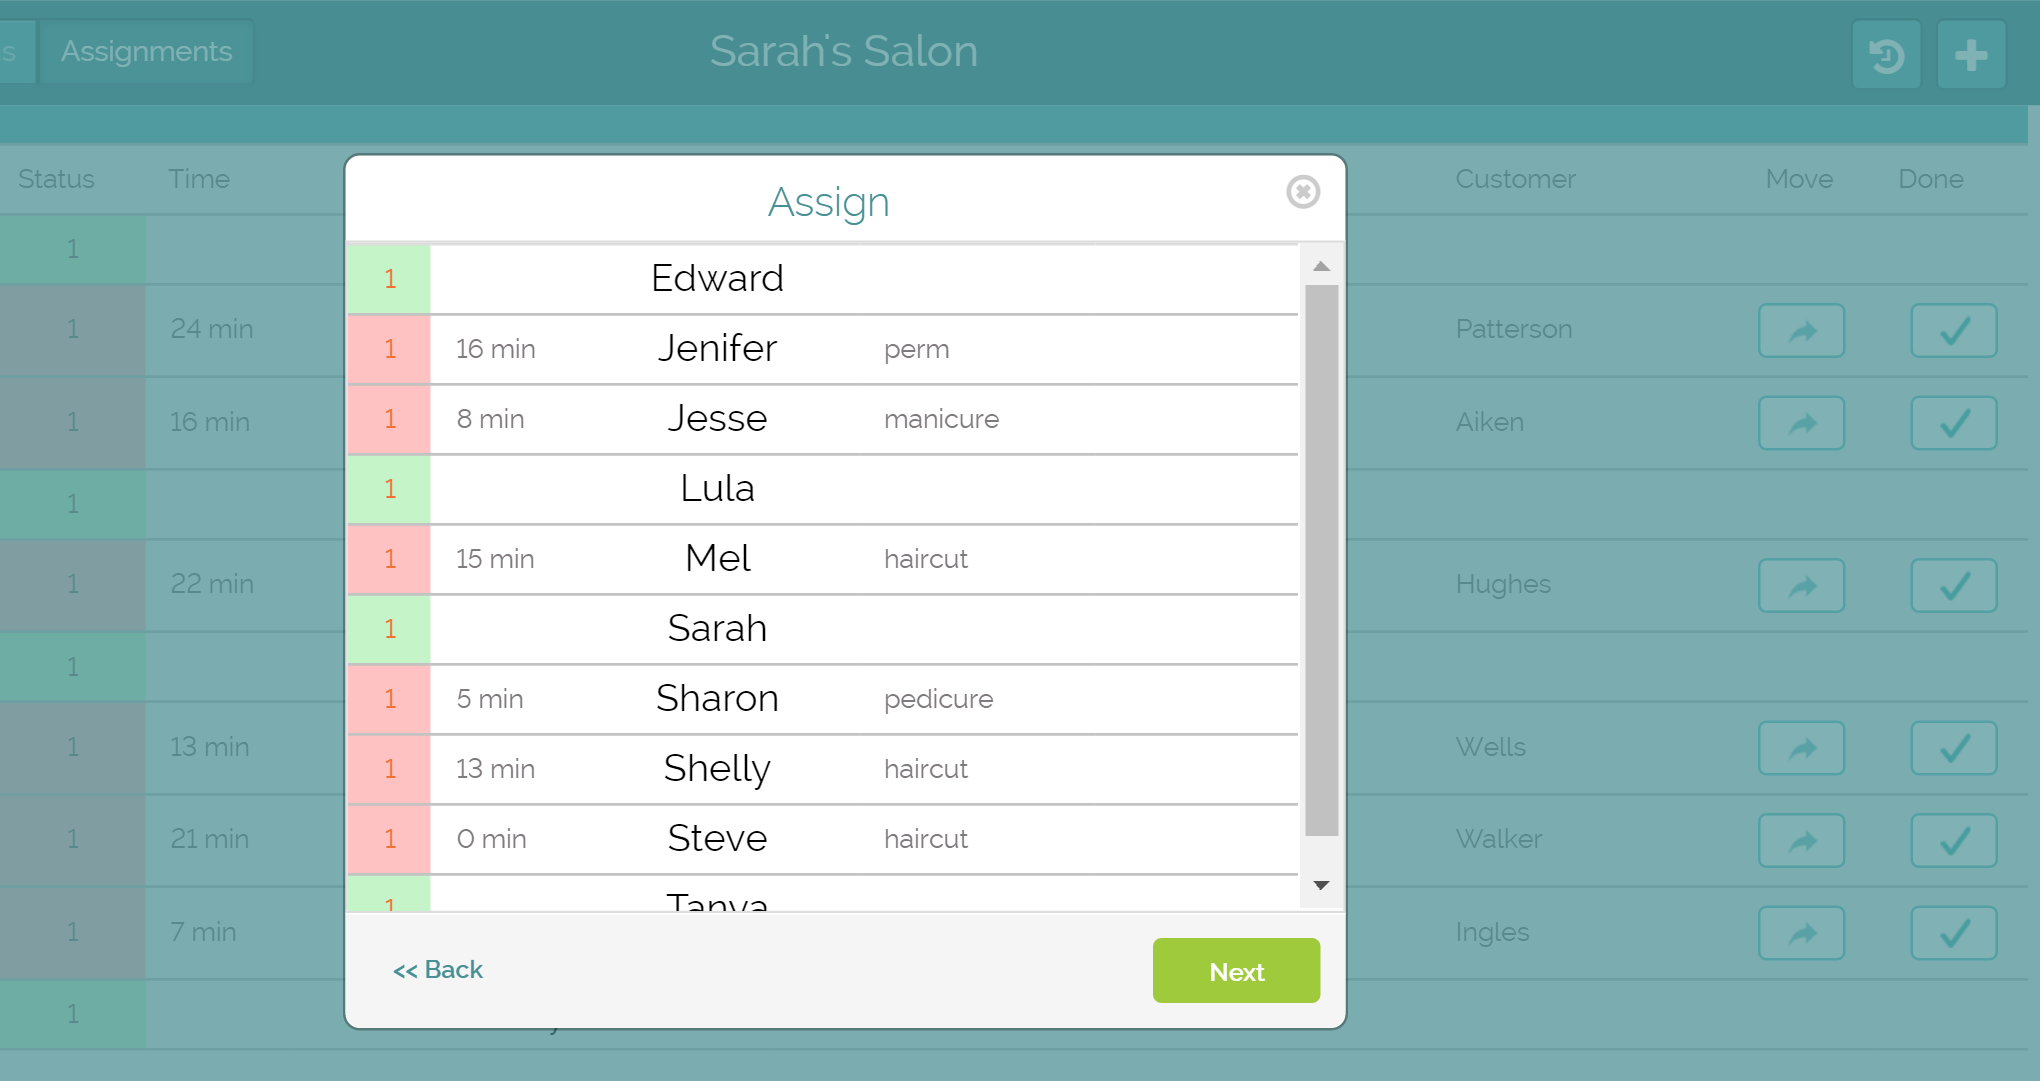
Resolution #2: Neatly integrate a waitlist with your reservations or appointments
The premium-level Reservation feature offers seamless waitlist integration. In one app, you can track appointments as well as walk-ins and offer accurate wait time estimates to both types of customers. It’s the best of both worlds for restaurants, offices, service providers.
Resolution #3: Impress customers with great service
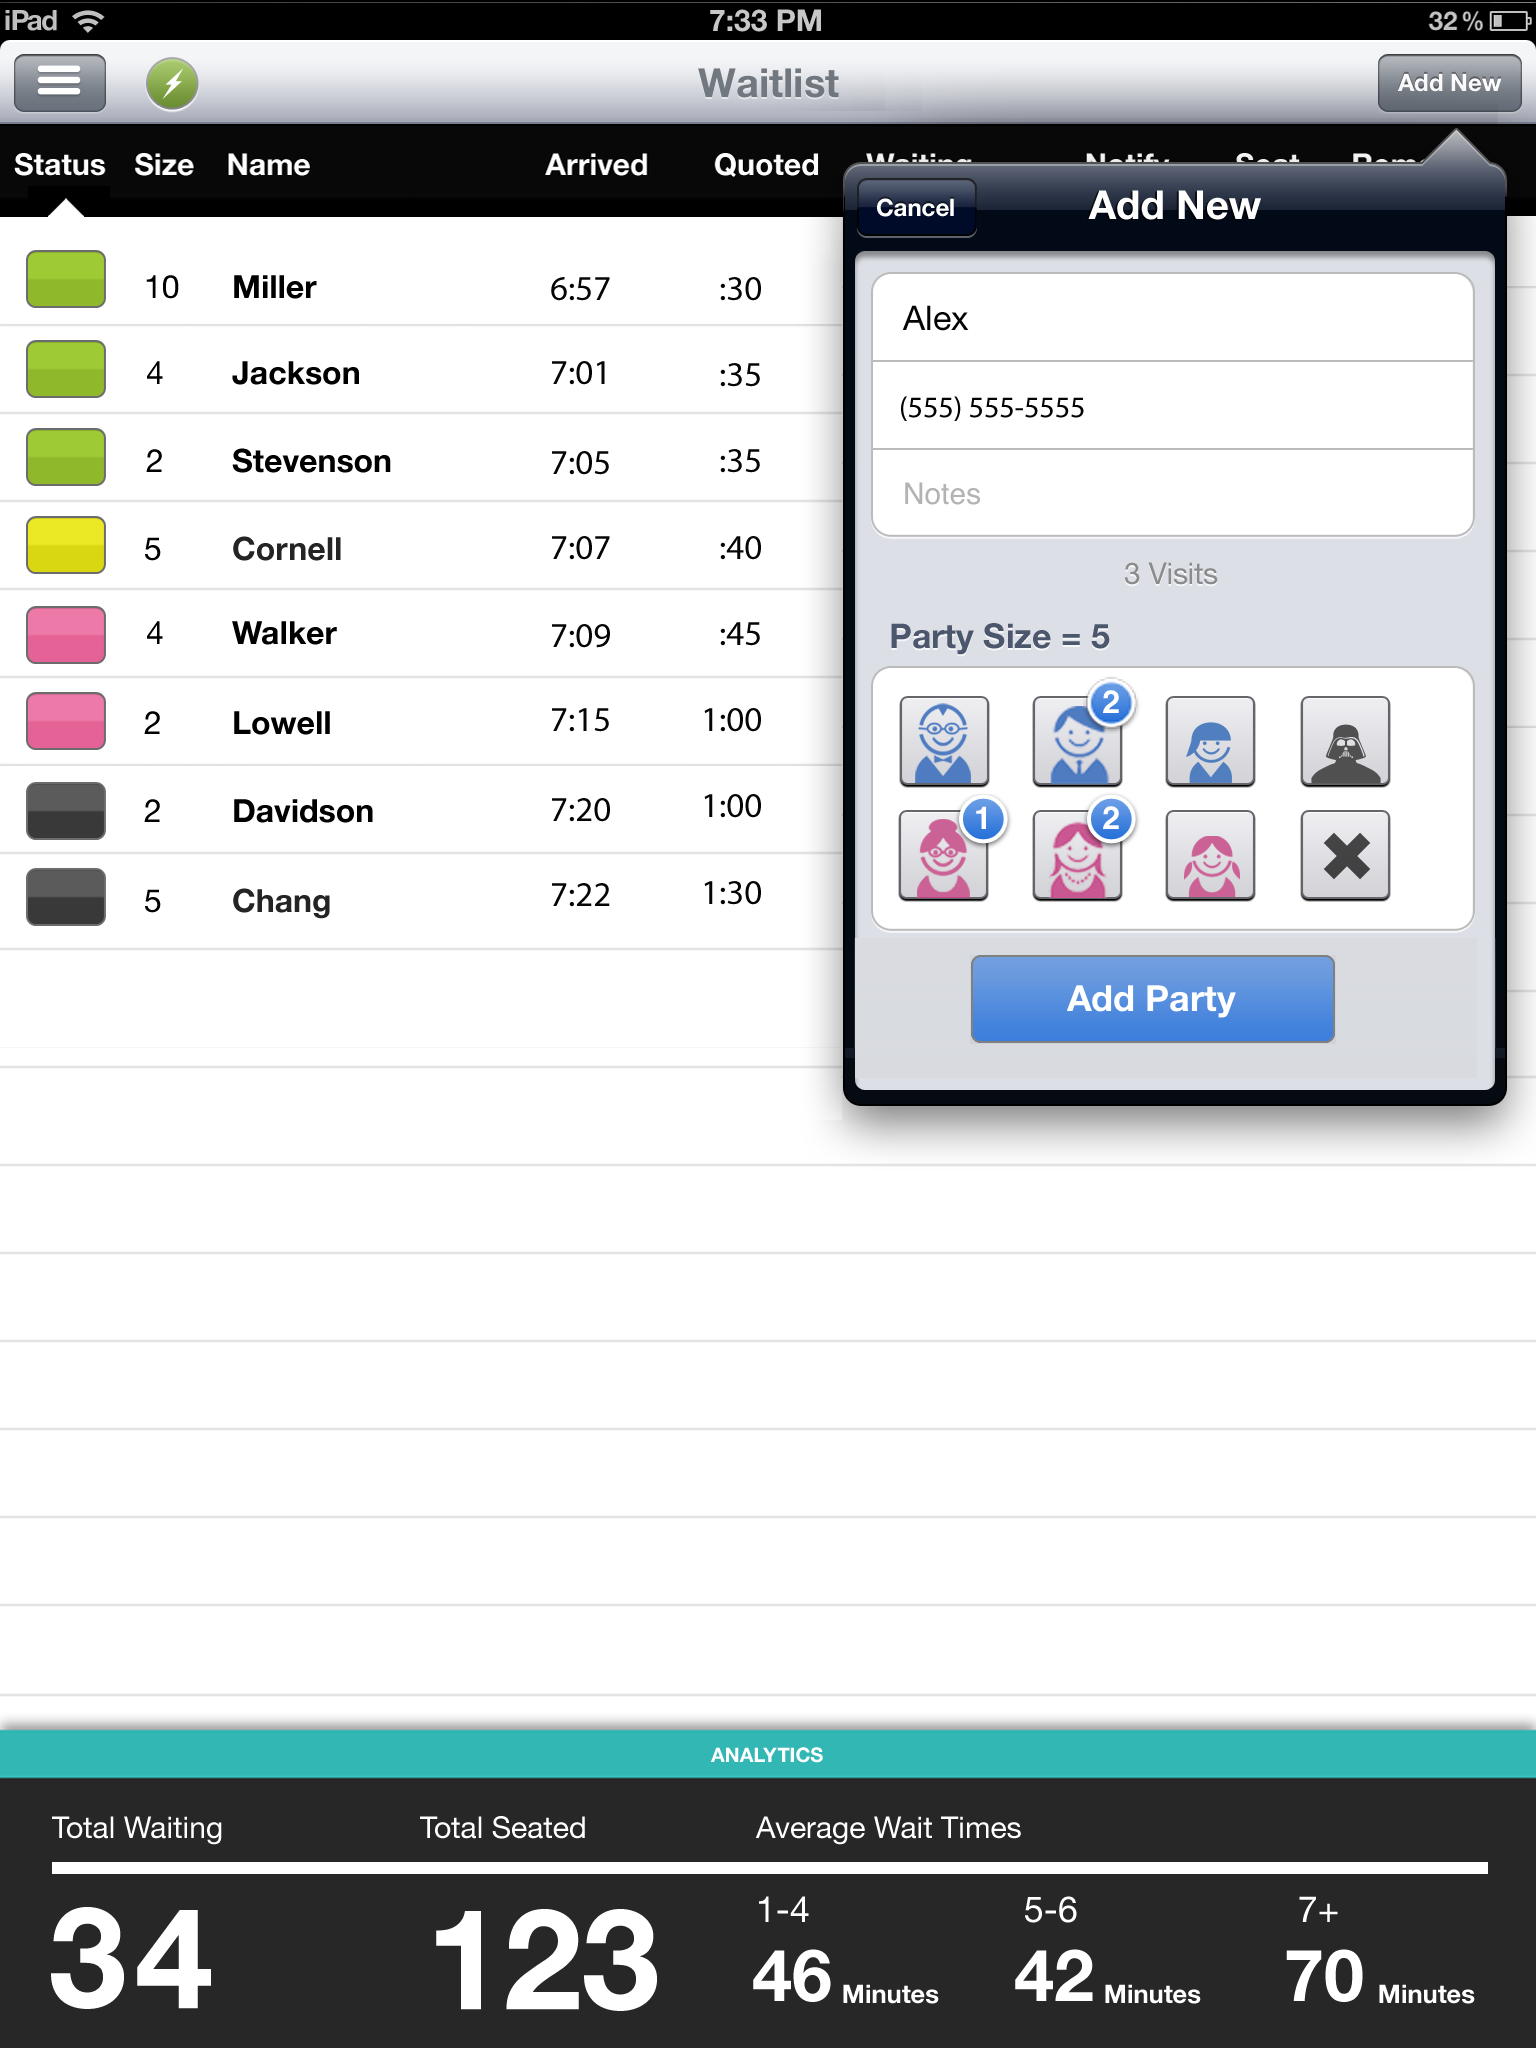
With Waitlist Me, even a rookie host can quote accurate wait times and set the right expectations. The app shows real-time waits next to quoted times to make it easy to improve and know when things are running ahead or slow. You can’t always control the wait time, but you can improve the wait experience by serving customers on time, when you say you will.
Resolution #4: Take the frustration out of long wait times
Our Text and Call Notifications combined with our Public Waitlist are designed to take headaches out waits for everyone. Customers are free to roam around the area, not worried about losing their place in line, and your staff can do their jobs without hungry diners asking when it’ll be their turn.
Resolution #5: Get it right the first time
Every level of Waitlist Me, from free to premium to pro, offers a Notes feature. Have a family that needs one high chair, two coloring pages, a gluten-free menu, and a wheelchair-accessible table? Make a note so that the party’s needs are front-and-center, no matter who seats them.
Resolution #6: Streamline your management
The Waitlist Me app was created to make your business easier to run, no matter how large or small. Multi-Device Sync lets you manage one account on extra computers, smartphones, or tablets—perfect for on-the-go businesses or large facilities—while Multi-Place Management lets regional and company-wide managers connect multiple locations to one (or more) Waitlist Me accounts.
Resolution #7: Become more customer-friendly
The premium-level Add Yourself widget and kiosk features and the pro-level business hours settings are easy-to-use tools that allow customers to join your waitlist or create a reservation without sitting on hold or waiting until you’re open. They’re available 24/7 from wherever your customer has internet access.
Resolution #8: Monitor your business’ productivity
Waitlist Me Pro allows you to track your resources. Whether you rely on table turnover, staff, special equipment, or something else entirely, our pro-level Resource Management feature tracks it for you, making it easy to see who and what is performing well and where you can make positive changes.
Resolution #9: Get more customer feedback
Comment cards not doing it for you? Our pro-level service incorporates Text Message Ratings and Customizable Survey features into the user experience. With a single text message reply or the click of a link, customers can quickly let you know what went right and what went wrong during their last visit.
Resolution #10: Make smarter business decisions
Don’t leave your biggest decisions up to guesswork. Waitlist Me Premium and Pro are loaded with our Reports feature. The in-app statistics track average wait times, business activity, demographics, customer loyalty, group size, and more. Plus, you can automate how you access the information via weekly email summaries or downloadable reports, making data one less thing you need to think about.