For serving customers more effectively, Waitlist Me has a set of features for managing tables across a couple main views. The floorplan view displays tables as they would appear spatially across one or more rooms with the basic table sizes, shapes, and positioning. The grid view gives a flexible way to sort and view tables by different dimensions such as section, size, and status. The views can be used together or independently, depending on business preferences, to track availability and easily know where to seat the next customer.
Previously, the phone versions of our apps only offered a list view of tables, optimized for smaller phone interfaces. To provide more flexibility in managing customer visits across devices, we have recently added the floorplan view and features to our apps for iPhones and Android phones. While detailed floorplans can often be more efficiently managed on larger devices like iPads or Android tablets, the phone versions are great for managers that may want to zoom in on a particular area or servers wanting to keep tabs on their sections from their phones.
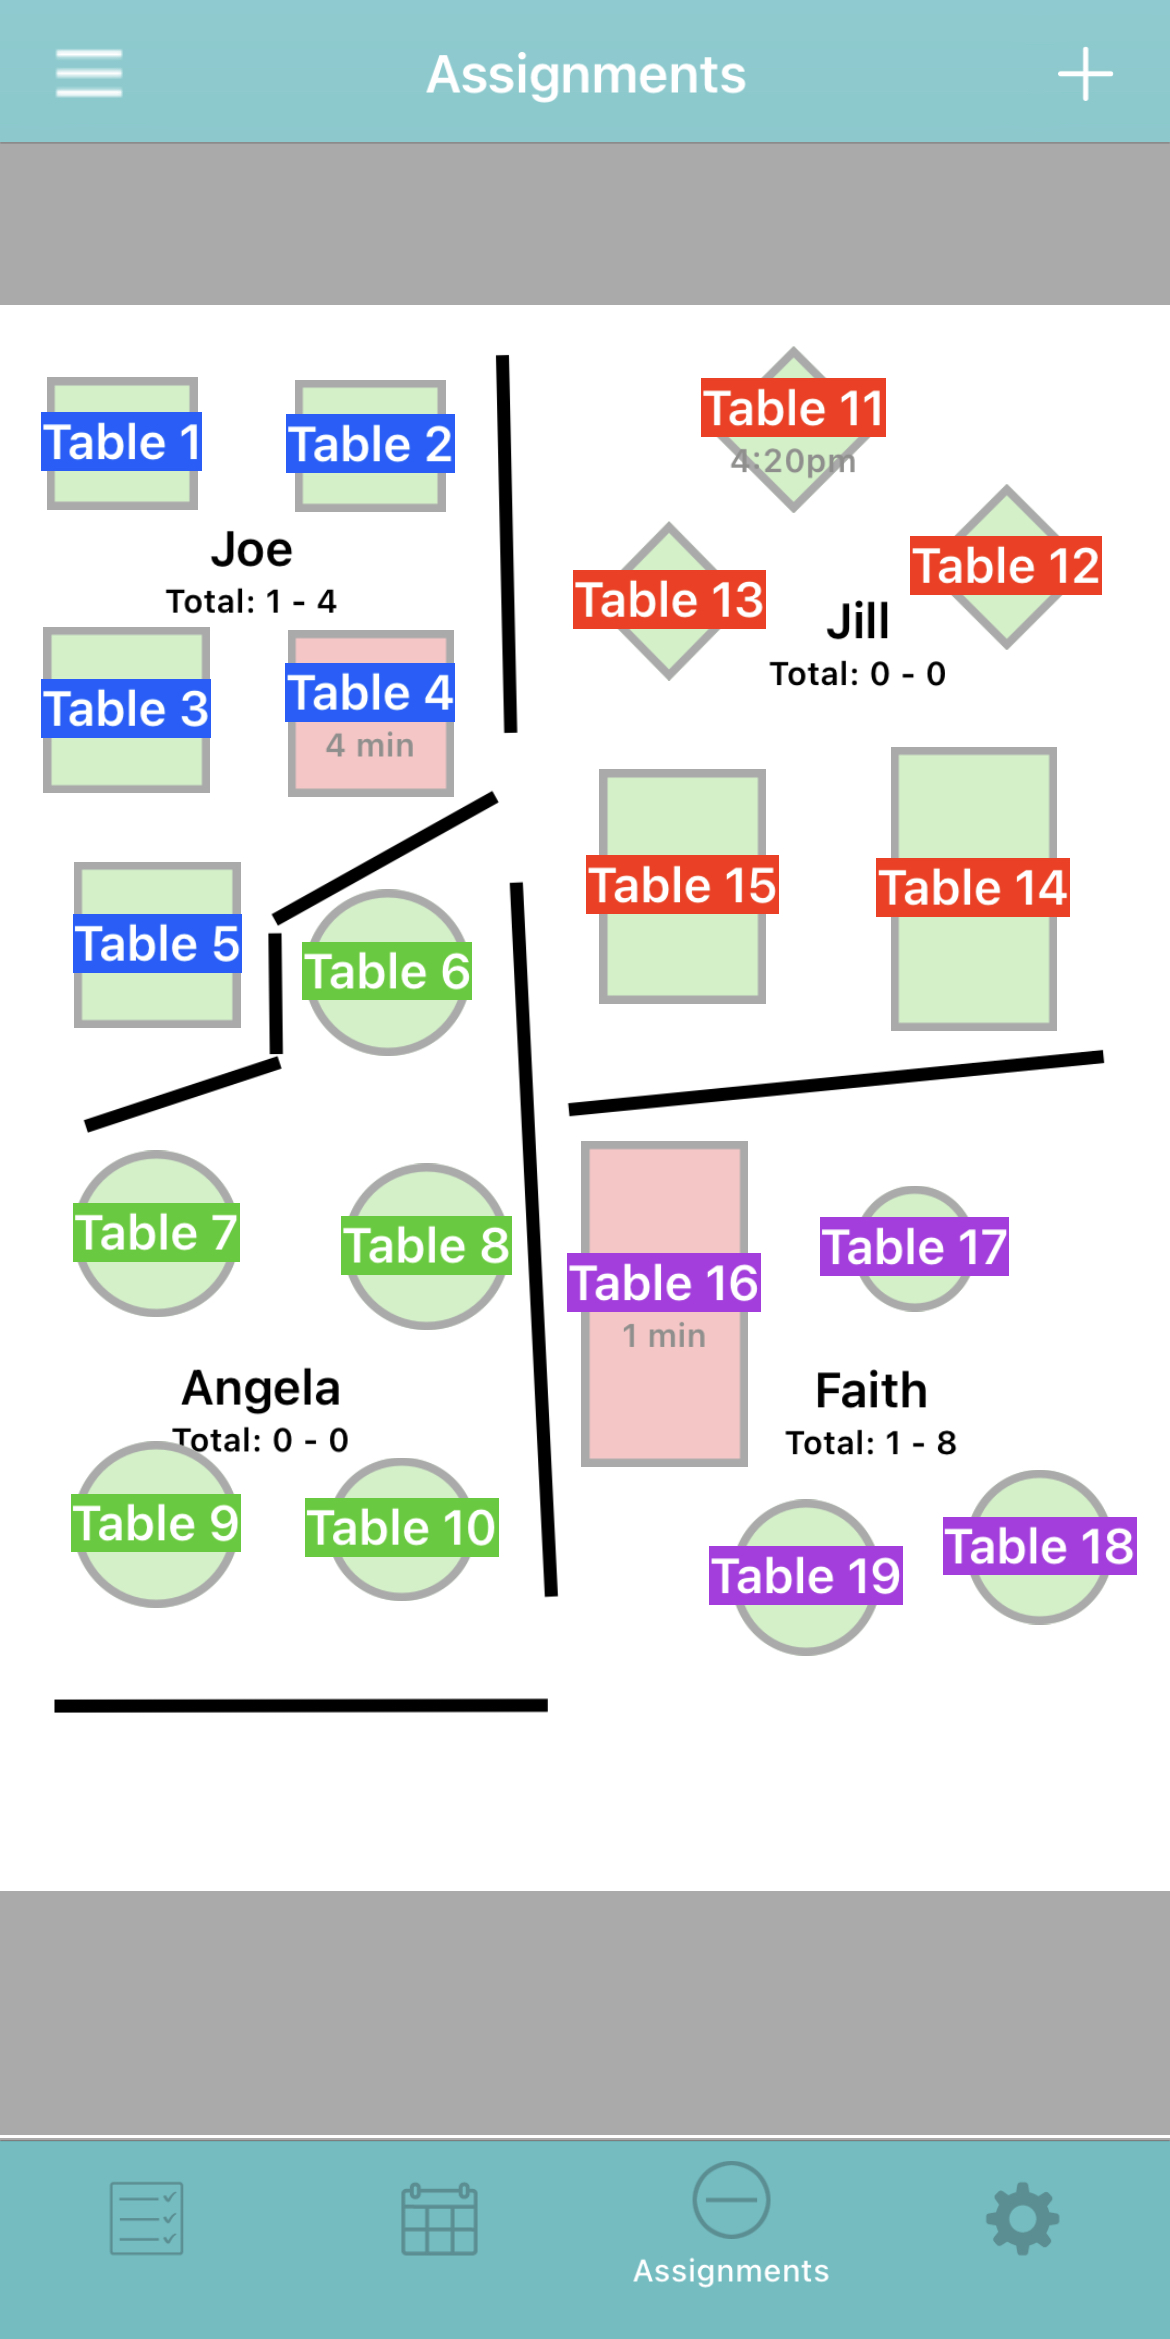
Features for setting up and managing sections and layouts are also now available on the phone applications, along with the tools for placing tables, lines, and data elements in the floorplan edit mode. Check out this page for more information on setting up floorplans.