We are happy to announce the opening of a new headquarters in Charleston, South Carolina. Waitlist Me started in the Silicon Valley by former Google employees as NoshList, a popular restaurant app, and expanded to serve businesses across multiple industries. As part of the company’s aggressive growth plans, Waitlist Me considered a wide range of options and was attracted to Charleston for a number of reasons.
“Charleston is a true hidden gem for tech start ups,” said Brian Hutchins, Waitlist Me CEO, “When you consider the beauty of the area and all the things the city has to offer, it is hard to beat the quality of life, and that is a key strategic advantage in attracting and retaining top talent. Furthermore, smart investments made in infrastructure and programs to support business innovation are starting to pay dividends in Charleston, and the local tech economy is evolving rapidly. Waitlist Me has an office at the Charleston Digital Corridor, is part of the Harbor’s Propel accelerator program, and will be exhibiting at the DigSouth. These are a few examples of very valuable initiatives that have come into their own relatively recently.”
To celebrate the occasion, the company will be giving away a free year of its Premium service to ten Charleston businesses that need it most, based on suggestions from locals. The offer is designed to raise awareness around how technology can improve wait experiences in Charleston. It also opens up ways for the broader community to engage and share ideas. Many businesses are still struggling by using paper or clunky buzzer systems, and don’t realize there are better ways to manage their waits. People that visit these places feel the pain though. Nominating a business for the prizes is as simple as visiting www.waitlist.me/charleston and sharing a business name and experience that could be improved.
Charleston is well known for its hospitality, and Waitlist Me is tool local businesses can use to help offer the exceptional level service that makes it a top tourist destination as well as a great place to live. Instead of just standing around bored or frustrated, waiting customers could take a nice stroll, experience more of the city, shop, and more. It’s a win-win for everyone, and we are hoping people will help us spread the word.
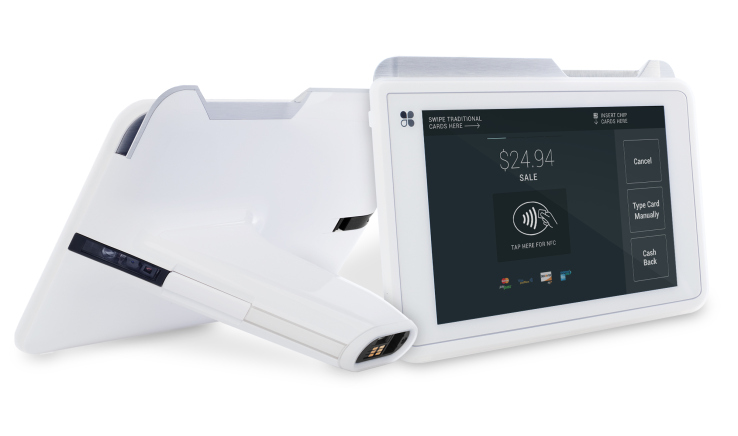
Earlier this month, Clover added two new devices to their Point of Sale solutions, Clover Mini and Clover Mobile. As an early app developer for Clover, we are very excited about this launch because it opens new ways for businesses to use Waitlist Me for their waitlists and reservations. Clover Mobile is a perfect fit for Waitlist Me because it lets businesses add customers to the waitlist right at the door as well as update statuses and check people off the list from other parts of their store or restaurant.
Clover Mobile is a wireless device, so merchants can do a variety of activities from anywhere. They can place orders, take payments, scan inventory, manage employee hours, sync sales data with accounting software, and other activities from where it is most convenient. The Clover Mini is designed to be a simple but powerful replacement to the traditional credit card terminal, so it does the core credit card processing and receipt printing needed for payment transactions, plus a lot more. Both devices have the sleek designs Clover is known for and the flexibility of customizing functionality through their integrated App Market. Waitlist Me is available and optimized for both of the new devices.
POS terminals have changed over the course of several years, and Clover is at the forefront of creating better and more efficient hardware and solutions for businesses in this category. Because of the deeper integration Clover allows, Waitlist Me is able to offer more efficient tools for businesses and better experiences for their customers on the Clover platform.
With the floorplan features in Waitlist Me, it’s easy to visualize your tables and manage your sections and staff.
In Floorplan view, you’ll see all of your tables, arranged however you like. Green tables are open; red tables are occupied. You can also see how long a table has been occupied, or if it’s been reserved for a particular time. And you can tap on a table to open the action bar, where you can see details about the party, update their table’s status, clear the table when they’re done, and more.
You can also see your sections, marked with colors, dividing lines, or both. You can create custom layouts, and change these sections on the fly. Perhaps three sections is enough for a quiet lunch, but you need more for a busy evening. You can see which employee is working each section, and how many groups, and how many people, they’ve served today. You can zoom in for a closer look, and scroll across your floorplan. You can even see floorplans for other parts of your restaurant—for instance, for your patio or an upstairs meeting room. It’s all up to you.
To start building your own floorplans, just tap on the round icon to access the table management section.
Notice: Here in Grid view, you can see that I’ve already set up some basic tables. Each one has a name (in this case, the table number), and a size: the number of people it can seat. And I’ve divided those tables into sections. If you need any help with tables and sections, please see our video on “Managing Tables.”
Now, tap the button on the right, and switch to Floorplan view.
The first time you visit this page, you’ll be prompted to add a room—for instance, your main dining room. Just give your room a name, choose a portrait or landscape orientation for your floorplan, and then tap “Add.” You can add additional rooms if you like. Then, tap “Back,” to save. You can tap on the name of your room at any time, to see a different room, or to add additional rooms.
Now, tap “Edit,” to start building your floorplan. If you have not yet created your tables, just tap on the gear icon to access the table management settings, where you can manage your tables, sections, layouts, and more. Or, if you’re ready to proceed, just make sure you’ve selected the room you want to design. And then, tap “Add.”
You can choose an existing table from the list—or, add a new table at the top. (Simply give your new table a name, specify how many people it can seat, and tap Save.)
You’ll be prompted to choose the physical size, and the shape, for this table.
Now, just tap where you want your table to go. The table appears on your floorplan, along with a set of tools. You can tap and drag, to adjust your table’s position. Drag the arrows to stretch the table in a single direction. Use the double arrow to stretch your table in both directions at once. Tap the round arrows to rotate your table, by 45 degrees at a time. Tap the copy icon, and then choose an existing table or set up a new one, to make it exactly the same size and shape on your floorplan. Or, tap the dots, to edit the table’s name and size, or to delete it entirely. When you’re ready, tap anywhere else on the screen to hide these tools.
You can add as many tables as you need.
If you like, you can also use your floorplan to work with any sections and layouts you’ve defined for your restaurant. (For help setting up sections and layouts, please see our video on “Managing Tables.”)
Choose a room, and a layout. And then, tap “Add,” and choose “Element.”
You can add a dividing line—just tap to give your line a starting point, and an ending point. You can drag either of these points to adjust the angle of your line, or move the whole line to a new position. And again, tap anywhere else when you’re done.
Or, you can tap “Add,” choose “Element,” and then pick “Label.” Just choose which section this label is for. And tap on the screen to choose its position.
When your floorplan is complete, tap “Exit.” Then, tap “Yes” to save your changes.
Once you leave Edit mode, your section labels are automatically updated to show helpful details—by default, the name of the server in each section, and how many groups and individual customers they’ve served today.
Of course, you can come back to Edit Mode at any time, and update your floorplan. Or, you can modify your floorplan for another layout—for instance, to set up this same room for a different shift. Your tables remain where they are, but your lines and labels disappear, so you can set up a different set of sections for that shift. Then, you’ll be able to change your sections on the fly, as you move through your day.
Remember, you can tap the gear icon to access the settings pages for your tables, sections, and layouts.
For more options, tap “Display,” and then choose “Floorplan.” For instance, you can change the size of the text in your section labels, and decide what information those labels should include. By default, the label shows any notes for the section (for instance, the name of the server), and the total number of parties, and individual customers, who’ve been seated in that section today. But if you like, you can show the current number of open tables (and/or occupied tables) in each section, instead.
In the same way, you can decide what information should appear directly on your tables. By default, you’ll see how long each table has been occupied. But you can hide this information—or show the name of the section, instead. And if you’ve assigned colors to your tables, you can use these colors to highlight the table name (in this case, the table number), or highlight the name of the section, or not.
You can also come back to Grid view, tap “Time” at the top, and decide how to calculate the totals that will appear in the section labels on your floorplan. Would you like to see how many parties, and how many individual customers, you’ve served in each section all day, or just during the current shift? Or, would you like to see your totals for the past so many hours—from the past 1 hour, to the past 24?
Now, you’re ready to start using your floorplans. At the beginning of each shift, simply choose the appropriate layout, to instantly update your sections. Then, tap on any section label, for a list of all of your sections, and your notes on each one—in this case, the name of the server assigned there. Tap “Clear All,” fill in the servers for the new shift, and then save your changes, and you’re ready to get to work.
And remember, you can tap “Open” at the bottom, to enter split-screen mode, where you can see your floorplan, and your waitlist, at once. You can drag the handle to show more or less of the waitlist—or tap “Close” to hide it entirely and only see your floorplan.
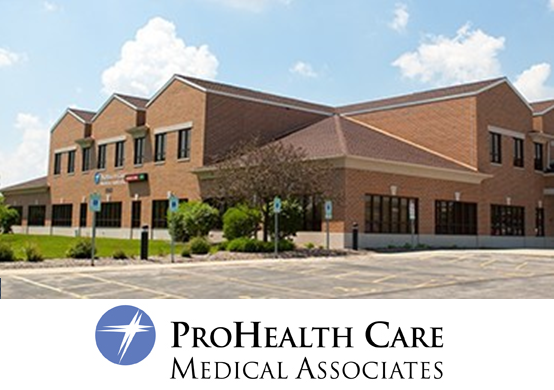
Being sick is no fun for anyone. And when you are sick, one of the top things on your mind is how to get better as soon as possible. It isn’t surprising that having to wait to talk to a physician can be a frustrating experience, but ProHealth Care Medical Associates found that using Waitlist to give patients a better sense of their wait made patients and physicians happier.
ProHealth Care Medical Associates is an award-winning regional specialty and primary care system with services throughout Southeastern Wisconsin. As part of the ProHealth Care program, the system has an integrated network of closely aligned independent physicians. Services encompass nearly all aspects of health care and includes hospitals, medical clinics, home care and hospice, integrative medicine, well-being and fitness centers, and more.
The centers have eight urgent care facilities within a 25-mile radius and see patients on a walk-in basis, which means wait times to see doctors can take anywhere from 60 to 90 minutes.
“One of the things we were hearing from our patients is that they weren’t happy with our wait times,” said Kelly Tolson, Director of Operations at ProHealth Care. “During cold and flu season, it can be anywhere from a 90 minute to two hour wait. Two hours is unacceptable.”
Tolson and ProHealth site leader, Maureen Sensiba, were looking for a way to make wait times easier to manage for patients, when they were approached by a patient who had seen the NoshList wait list app in use at a local restaurant.
“One of our patients had been added to a waitlist and notified when their table was ready at a Red Robin restaurant, and she said it was an awesome feature,” Sensiba said. “She raved about it. So afterward, I did some research on my own and contacted NoshList to see how we could make it work for our situation.”
The customer was specifically pleased with how the wait list app gave her the ability to shop while she waited for her table at Red Robin. That also caught the attention of Tolson and Sensiba, since it would be nice for patients to not have to be constrained to the waiting area.
Before getting started, the app had to be shown to the company’s patient experience officer and corporate compliance officer attorney to ensure the app wasn’t in violation of any patient privacy issues. Because the app only shows patient initials, it does not violate HIPPA rules or any other privacy rule, and Tolson was given the ability to then launch the app at the Medical Associates Brookfield, Wisc. location.
“Brookfield was a great place to start because it’s a small community. People could go home, have lunch or run errands while they waited to be seen by a doctor and get back in a short amount of time,” Tolson said. “It has worked so well that we have expanded it to another location and have plans to roll it out to the remaining six within the next six months.”
How it works
When ProHealth first started using NoshList, it was more popularly used as an iPad app, so they had to be a little creative in getting to fit their needs for an urgent care waitlist from a computer. Tolson and Sensiba realized that they could customize the public waitlist web page and the Add Yourself feature that restaurants normally use to allow diners to add themselves to a list, and they adapted this functionality for their staff to enter the information.
The patient names are put into a computer once they arrive at the center, and they can check their place in line from a phone or computer. When other patients look at the waitlist to determine where they are in line, only the patients’ initials are visible. Then when it is a patient’s turn, the ProHealth staff uses the regular waitlist view to trigger the text and call notifications and remove people from the list.
Since that time, NoshList has added the ability to do everything in one place in the browser, and early adopters like ProHealth Care that started using the system in new ways and sending feedback helped drive these product improvements.
“It was very smart how Tolson and Sensiba figured out how to use the NoshList public waitlist page, which was designed for other purposes, to serve as a simple entry form that could be used by multiple people on computers,” said NoshList CEO, Craig Walker. “We were all very impressed at NoshList, and have been building more and more improvements into our service to make it better for cases like these and for solving the wait problem everywhere.“
While the facility operators have yet to determine how the app has impacted wait times, customers appear to be happy with the solution.
“I don’t know if their wait times have decreased, but patients are more satisfied because we are being more respectful of their time,” Sensiba said. “We know they have other things they could be doing and we’re giving them an opportunity to do those things if there is a long wait.”
The physicians also are happier.
“We expected the patients would appreciate the new waitlist options, but we didn’t anticipate that the physicians would also be happier, because the patients are happier when they get into the room,” Tolson said. “That has been a very nice surprise.”
Any diner can appreciate black-and-white tile and chrome
fixtures. Retro is always in, baby!
But there’s a line between old-school cool and remarkably outdated.
Wondering where your restaurant falls? One easy way to tell is to check what’s waiting for queuers at your hostess stand. Is it a mobile device with a waitlist app, like Waitlist Me? Totally this-century. Is it a grease board and a dirty rag? A little grody looking, but still sitting on the fence. Is it a basketful of buzzers? Time for an overhaul!
Don’t believe us? Listen in to what your customers have to
say when they’re handed a buzzer and told to wait ‘til it goes off.
“I’m not holding it.”
At 5, a buzzer is a novelty. It vibrates! It lights up! You
get to be the first to know when it’s your turn! Unlike watching a cat chase a
laser pointer, though, it’s a novelty that grows stale with age. While many
customers are totally down for coloring alongside the kids—um, if you’ll
upgrade that crossword puzzle, please—they’re ready to leave the buzzers to the
grade schoolers.
“Gross! I don’t want to touch it.”
When was the last time you cleaned those greaseballs? Even
though customers get them before their food, buzzers tend to be streaked with
dust, grease, and who-knows-what else. In the age of germaphobia and a rising
spate of super-bacteria, customers would really rather not come that close to a
buzzing petri dish, thanks.
“Darn, what if I don’t hear it buzz?”
You’d think a hand-held buzzer would be easy to notice but
often times, they aren’t. In fact, if customers set them down on the bar or
slide them into a jacket pocket, the flashing lights and rattling plastic are
easy to miss. To prevent this, one or more guests will disengage from the
social atmosphere you’ve worked hard to create, all to ensure that they don’t
miss out on their table.
“Someone needs to hold my drink.”
Short of a menu taller than a toddler, there’s nothing
clunkier than a restaurant buzzer. Customers either need to set them down
(where they tend to be forgotten), balance them on a limb (where they tend to
fall), or hold them in one hand (where they take up much-needed real estate). For
those that are keeping tabs of coats, bags, children, phones, or beverages, this
becomes a nuisance they quickly resent.
“How close do you think we need to be?”
Will a buzzer work outside the lobby? How far from the front
doors can customers wander? Being handed a buzzer on a crowded evening puts
guests in a precarious situation: They need to pinpoint a space where they can
comfortably wait and where the buzzer
will still work. For long wait times, this can create anxiety. With every
minute that ticks by, they wonder if maybe they missed their table. Cue
constant check-ins with your staff, which defeats the purpose of the buzzer in
the first place.
A better solution
Replace those outdated, expensive buzzers with a more up-to-date solution. Waitlist Me is so simple you can get started in a few minutes, and your guests will appreciate receiving a text instead of a clunky buzzer.