If you listen to the internet’s many critics, millennials are self-obsessed complainers with a penchant for arrogance, an aversion to risk, and some serious Peter Pan Syndrome.
They also eat out five times a week, are looking to make big purchases, and prioritize investments in their mental health and physical fitness. Their spending power is estimated at $3.39 trillion. By 2020, they’ll be the ones paying for one-third of the world’s goods and services.
Millennials are increasingly becoming the customers you need to know inside and out. Who are they? How do they spend their money? What do they want?
Let’s take a closer look.
Who is the millennial customer?
Most people who consider themselves to be “young adults” fit into the millennial category. They were born between the early 1980s and the turn of the century (the generation’s end date waffles between the mid-nineties and the early 2000s, depending on who you ask). Today, millennials range in age from about 16 to 36. They are just now coming into their own as college graduates, young professionals, married homeowners, and parents.
Millennials make up the majority of the workforce in the United States. By 2025, 75 percent of the workforce world-wide will be made up of this one generation. The world is their oyster, and their wallets are open.
How do millennials spend their money?
Millennials pay more for brands and experiences—if the business in question offers them some sort of added benefit. That could mean more convenience, an alignment of their personal values, a better user experience, or greater perceived value.
They’re also incredibly loyal. Once they find a brand they love, whether it’s a store, a restaurant, a hotel, a gym, a salon, literally anything, they’ll stick with it. And, thanks to their penchant for social media, they’ll spread the word. With millennials on your side, referral business can become your new best friend.
What do millennials want?
This generation grew up as the internet was finding its legs. The oldest millennials were computer-savvy before Google was a thing, while the youngest can’t remember a world without YouTube. They’re gamers, emailers, texters, and content-consumers—and they expect the rest of the world to keep up with them.
What does that mean for you?
Eliminate the wait
For millennials, on-demand everything is the norm. A long waiting list is a major drawback. A long line? For those not enticed by hype or the cool-factor, long lines mean finding the next best thing: your nearest competitor.
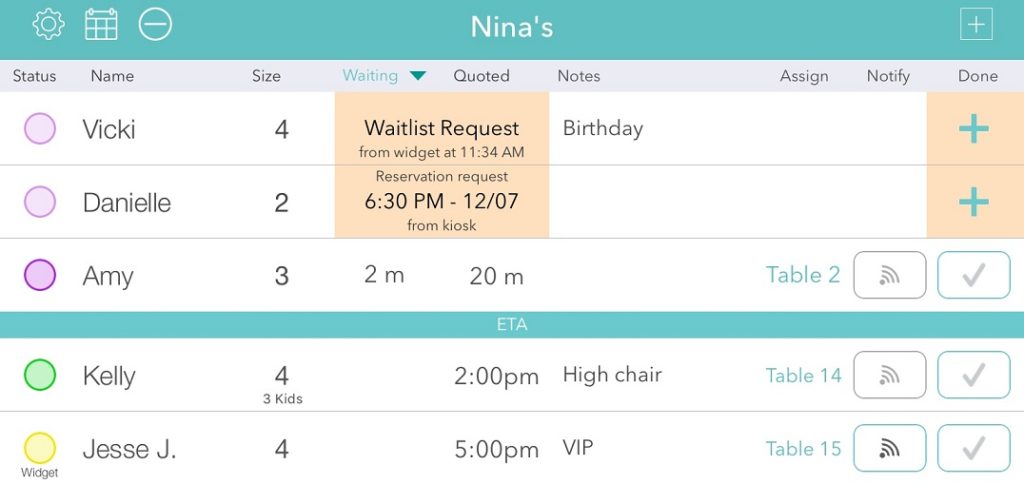
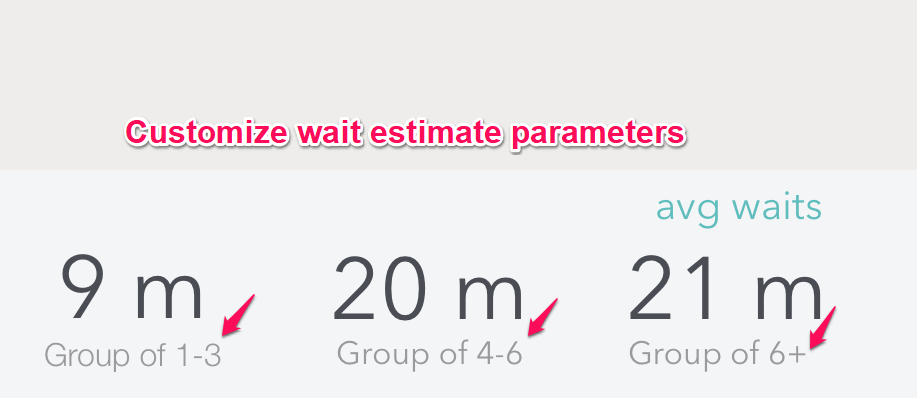
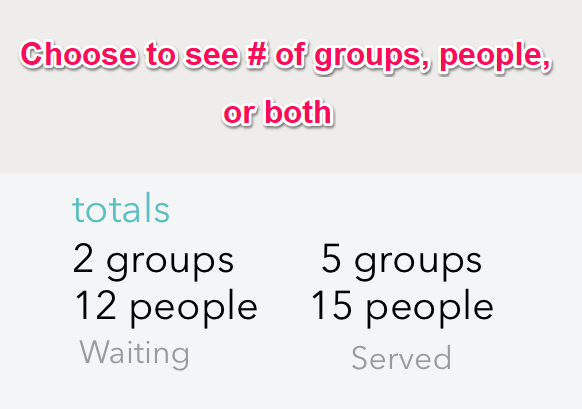
Waitlist Me shortens lines and makes them invisible to new customers. The app lets you accurately estimate wait times and track your business’ resources, which can help you become more efficient over time. It also frees customers from your waiting area. This gives the illusion of shorter wait times, which makes more people want to stick around.
Be available on your customers’ terms
With the internet comes 24/7/365 availability. Does your small business need to be open all the time, every day of the year? Absolutely not! But to win over a millennial crowd, you need to create a digital presence that is open to customers around the clock.
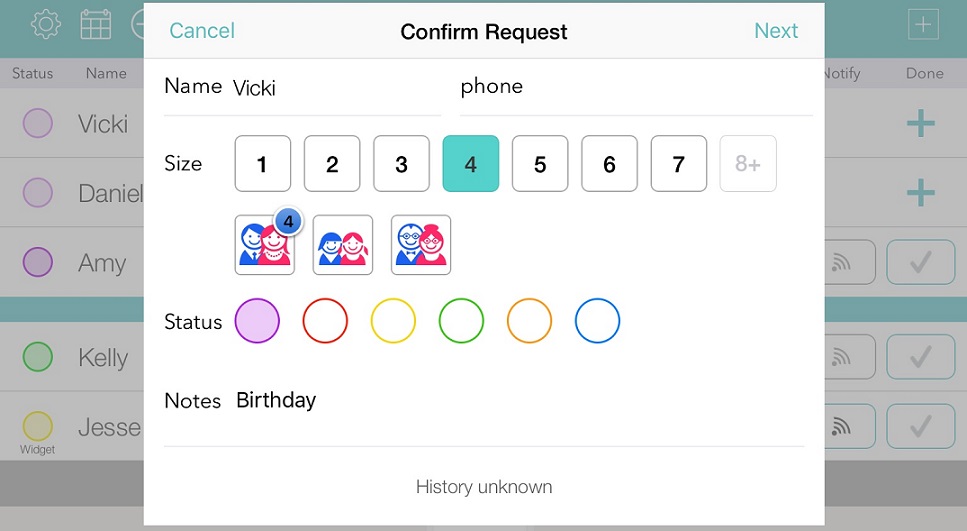
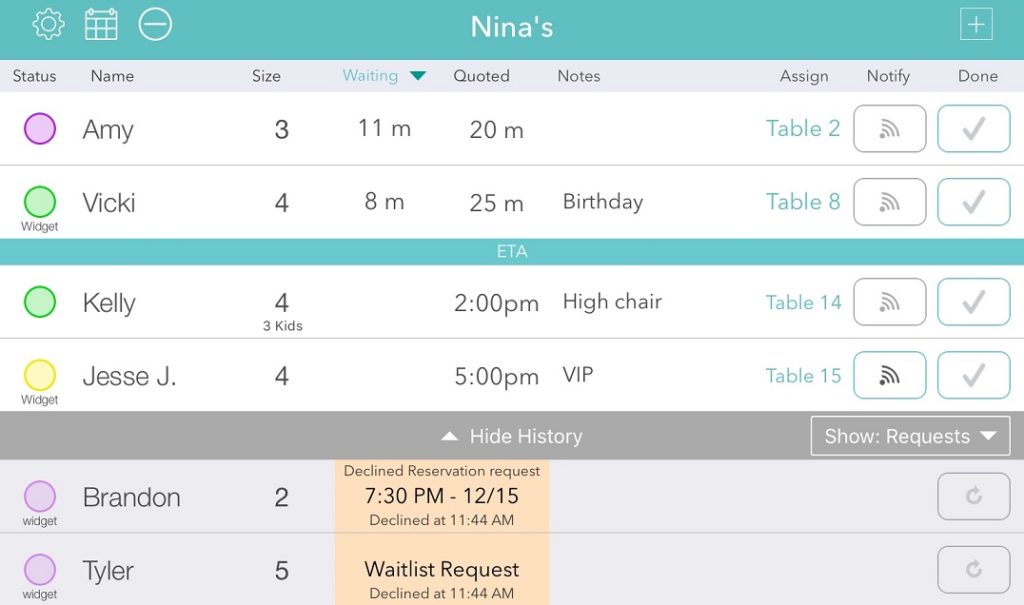
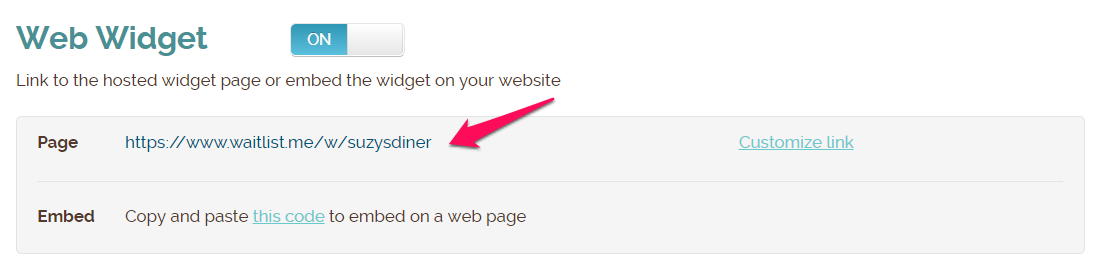
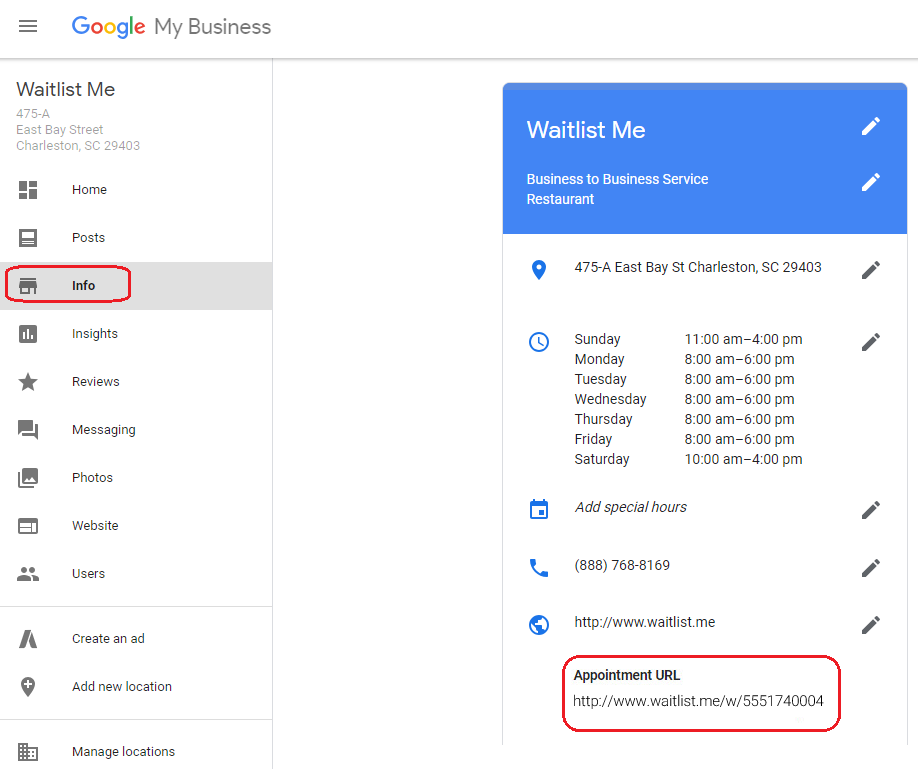
We make it easy to do just that. Waitlist Me offers an add-yourself widget, which you can easily include on your business’ website. The widget lets customers add themselves to your waitlist, reservations, or appointment schedule from wherever they are. You can also display black-out days, specials, and more.
Go mobile
Just because a millennial doesn’t leave home without a smartphone doesn’t mean they want to dial your number and speak to you one-on-one. This generation infinitely prefers texting over phone calls.
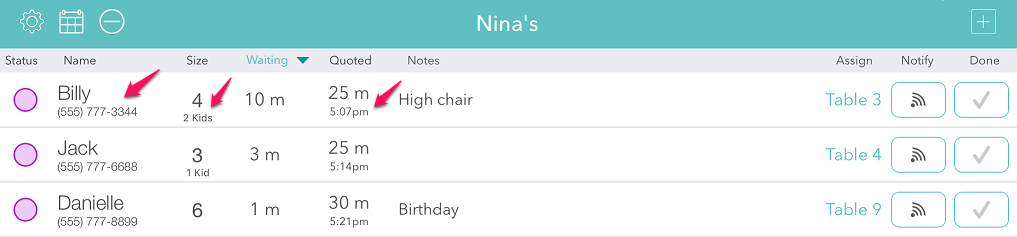
That’s why Waitlist Me built text message notifications directly into the platform. Forget about hollering out names in a crowded vestibule or passing out buzzing pagers. With a single gesture, you can send a message directly to the party next in line. Your guest will get the message on their phone instantly, wherever they are, just the way they like it.