Waitlist Me has a Web Widget feature that allows customers to add themselves to the waitlist or schedule reservations from your website or social page. Waitlist Me Pro offers some additional features for controlling when customers can do these actions:
* Business Hours lets you restrict the times that people can make reservations or appointments
* Display Hours limit the times the widget itself will be available for people to join the waitlist or request reservations
To set these up, go to the Add Yourself area of the settings in the app or on the Waitlist Me website (login online and navigate to Account > Settings > Add Yourself > Business Hours and Display Hours).
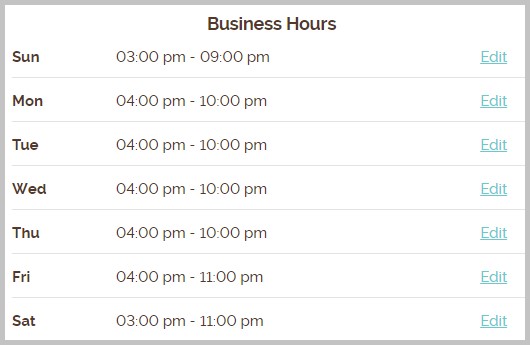
Business Hours
Set your business hours for when you wish to accept reservations. For example, if your business closes at 10:00 pm, you may not want to accept reservations after 9:00 pm. When customers try to book outside of that time, they will receive a message instructing them which time frames are available (you can edit this message). There are also options to limit group size and how many days out reservations can be made.
Display Hours
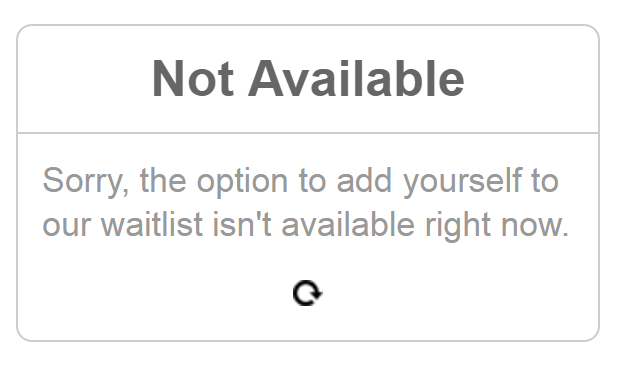
The Display Hours feature controls when this widget is available, so people don’t add themselves to the waitlist when you aren’t open or send reservation requests when you are not around to review them. You can also choose what message will appear when the widget isn’t active.
There are several other settings you can edit to get the most out of your subscription. Navigate to Account > Settings > Customize Settings (under the Add Yourself header), and here you can change the colors and titles of your Web Widget. The Display dropdown controls the metrics customers see for the current waitlist (number of people on the list, last time quoted, etc.).
In the General Settings section, there are options you can customize in the Add Yourself settings. for whether you want to accept requests for reservations and/or the waitlist, whether you want to automatically approve those requests. You can also choose what information you want to collect and require, like phone number, party size, and notes.
After configuring your widget, you’re ready to put it on your website. You can either add a link that will redirect to a hosted webpage, or add the widget itself directly onto your site. Also, you can enter HTML that will appear below the widget. For example, you may want to include instructions for customers to indicate if they prefer to sit inside or outside, or information about your loyalty program. Here is a video with more on how it works: