Tuesday, February 9th, 2021 .

Nowadays, with everything from smart mugs to smart bike helmets managing and monitoring our days and nights, you might be wondering if you really need to add another techie solution to your lifestyle.

While we won’t weigh in on, say, a smart saltshaker, there is a clever must-have that every business owner or manager will fall for fast. Waitlist Me is a waitlist and reservation app that will have you tossing your grease pens and appointment books after just one date—er, dinner service.

Designed with restaurants and a variety of other types of businesses in mind, Waitlist Me is a flexible, plug-and-play app that makes managing waitlists, reservations, and appointments a breeze. Keep reading for 7 reasons to L-O-V-E Waitlist Me.

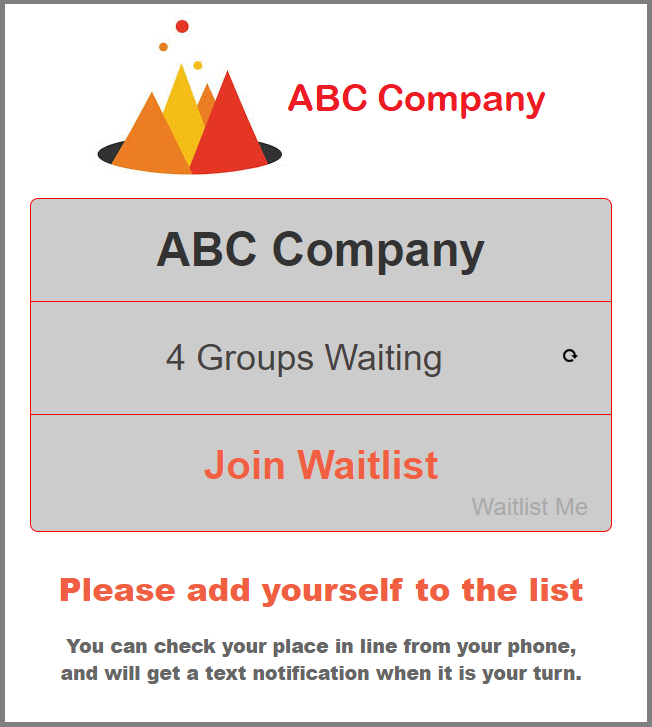
Lose the crowded lobby

Waitlist Me uses text notifications to alert your customers when they’ve made it to the front of the line. This allows them to maintain their place in line without standing in line. Our app sets them free, letting them wait while they window shop or drop off their dry-cleaning or hang out in the car.

Improvements made easy

Pro and Platinum subscribers are able to access Waitlist Me’s reports on table and assignment usage. You can harness this data to learn more about how your business uses its resources, from physical space to employees. With these numbers in hand, you can start making small changes that lead to cost savings, larger margins, and bigger bottom lines.

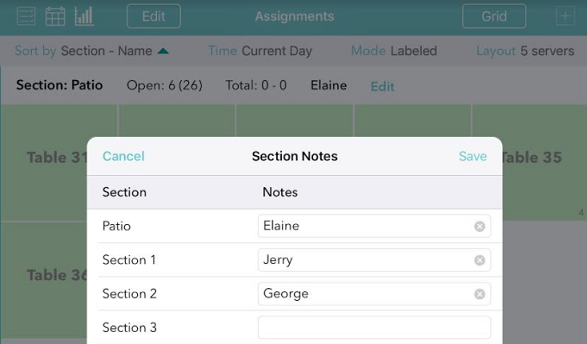
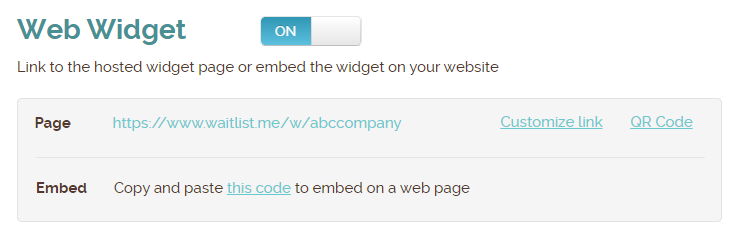
DIY updates are a cinch

Waitlist Me is built for businesses, not for techies. And because businesses can change from day to day, we’ve made it a breeze to make changes to your waitlist and the text message notifications you send to your clients—just in case.

A+ experience ratings

A hollering host? Not on our watch. Our waitlist and reservation app notifies guests by text when their table, their doctor, their changing room—whatever it is they’re waiting for—is ready for them. No rude interruptions and no missed summons makes for a five-star rating. Cheers!

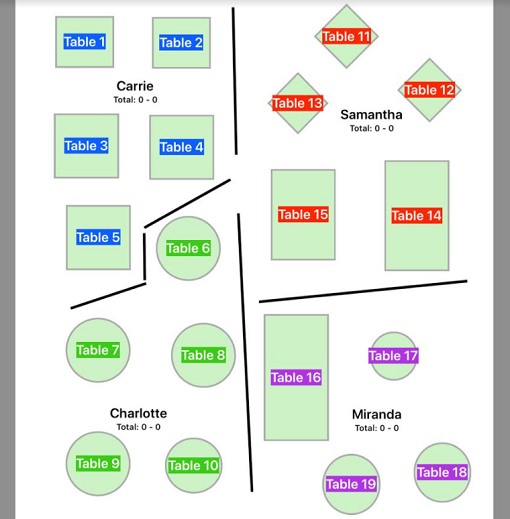
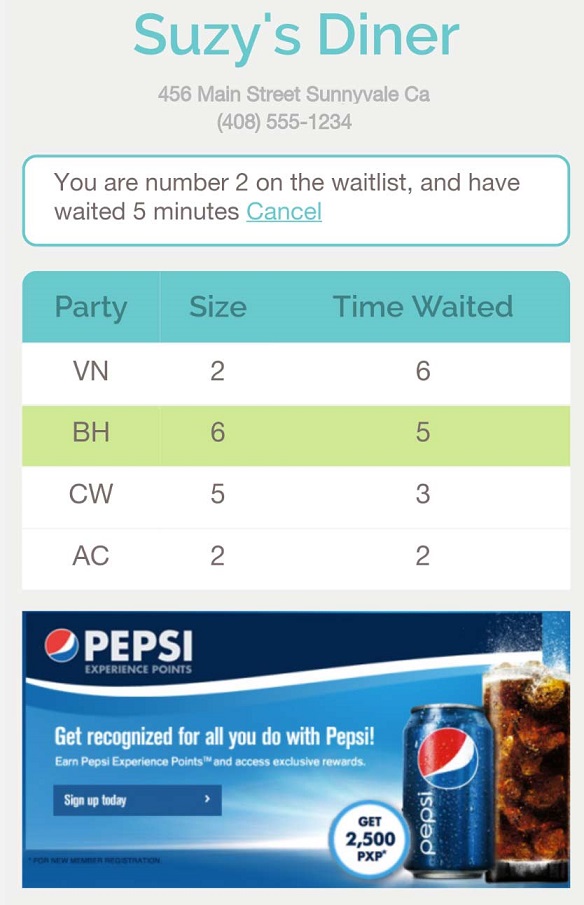
User-friendly interface

We’re reinventing waitlists, not apps, which is why we built Waitlist Me to be easy to use the second you log in. Our intuitive interface works the way you expect it to, and we’ve made all the most important information available at a single glance, giving you an ASAP way to see how your business is doing in the moment.

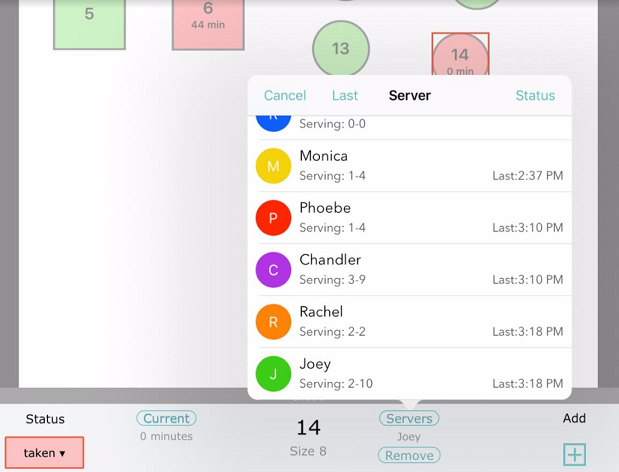
Unlimited device sync

Built for scale, Waitlist Me allows you to use as many devices as you want to manage one queue, all at the same time. Forget paying per user. Now, managers can ensure business runs smoothly while everyone else goes about their daily tasks.

Always upgrading

The development team is constantly looking for ways to improve our service. We are continuously talking to business owners and managers in different industries to see what would make their lives easier. Being better at business? Here are Waitlist Me, that’s our M.O.

Wednesday, December 16th, 2020 .

What kind of device can be used for the Waitlist Me service: a tablet, computer, or smartphone? Yes, yes and yes! The service can be used on iOS and Android mobile devices using apps from Apple iTunes or the Google Play Store as well as on computers through web browsers. You might choose to use one or a mixture of these depending on the size of your business and the features you want to utilize.

iPads and iPad Minis are the most popular device options due to the popularity and solid performance of these tablets. It is important to make sure the device is a newer model capable of running the most current version of iOS available, as Waitlist Me is optimized for the latest version in accordance with Apple’s guidance for developers. You don’t have to go out and buy the newest iPad. You can use a prior generation model if you already have one, but for example, you would not want to use an old iPad 2 that cannot run operating systems higher than iOS 9 with Apple now on iOS 14. You can check here whether your existing Apple device currently has or is able to update to the latest iOS version.

Android tablets are another popular choice for running Waitlist Me. Android has a wider range of manufacturers and price points, and to some degree you get what you pay for. We don’t recommend buying a cheaper Android tablet for less than $150, as you are more likely to run into performance issues. Look for a device with at least 2 GB of RAM, which would be in the middle of the range for Android tablets. The Samsung Galaxy Tab A is a popular choice. As with Apple, we advise using a tablet that is updated to the latest Android OS. Instructions for how to check and update your Android version can be found here.

You can also use Waitlist Me in a web browser on a computer or tablet, and we recommend using Chrome or Firefox for the best performance. Some of Waitlist Me’s more advanced features, however, are only available when using our iOS or Android apps on tablets.  For instance, our apps for tablets you can use our self check-in kiosk feature, the floorplan view, and a few other features that aren’t available in the browser.

Likewise, iPhone or Android smartphones can be used to run the Waitlist Me app and access the basic functions of the service like adding guests, sending notifications, adjusting assignments, etc. To take advantage of features like the spatial floorplan view, you would need to use a tablet with a 7” or larger screen.

Waitlist Me will also run on a Kindle or Fire tablet in a pinch, but we don’t recommend these devices due to performance limitations for more than basic waitlist management for places with lower usage. They are comparatively low-end devices designed more for consumers to use for reading e-books and other forms of entertainment. 

Thursday, December 3rd, 2020 .

Waitlist Me makes it simple to track table availability and server assignments. There are a couple options that can be customized to your business needs and workflows. 

If you manage your tables by section, the first thing you’d want to do is visit this page to learn more about setting up your sections and layouts. If your business isn’t a restaurant, you can also use these same features to group your staff, rooms, or other resources visually in the Grid view.

Our Pro level service provides a very simple way to know what server is assigned to what section by using the Assignment Notes feature. Simply tap on the “Notes” link to view a list of sections and text form fields where you can enter server names or other notes for each section. It is easy to see high level information about each section and make changes all at once.

With our Platinum level service, you can also set up an additional floorplan view, and be able to position these same notes where you’d like in the floorplan view.

Also with Platinum you also have the option to assign servers individually to tables and track the activity by server rather than section. This is especially useful if you don’t use sections and use a system of assigning tables based on server turns or server activity. Or if you have servers assigned to sections, but need to have some floaters to help out where needed or other cross section activity, you can combine the section notes with individual server assignments to keep track of everything.

To set up individual servers, tap on the gear icon in the Waitlist Me app to go to the Settings and then go to Manage Assignments > Servers. Here you can enter the names of your servers. Select Status on the upper right of this menu if you want to add colors for the servers. Using different colors can make it easier to see where your different servers are assigned. Or maybe you want all your patio servers coded as green to make it easier to distinguish them from the indoor servers. 

After a table has been seated, select the table to access the footer bar. Here you will see a Server button, which brings up a menu of active servers. Choose a name to assign that server. You can sort by alphabetical order, the number of tables or seats each has had, or the amount of time since the last table was sat for each employee. 

Also, in the upper right of this server window is a Status option. The Server Status area lets you mark the servers who aren’t working today as inactive, and to change status colors if needed. 

If you haven’t yet named your tables, you can do that in the settings under Assignments. For the Pro features, you can find helpful information on navigating the grid view here. For the Platinum features, the video on this page will show you how to place your tables in your floorplan. 

Thursday, October 29th, 2020 .

In today’s age of social distancing, some businesses are using QR functionality to increase ‘touchless’ options for customers. For example, it has become more common for restaurants to place QR codes on tables so that customers can use their cell phone to quickly access an online version of their menus.

Waitlist Me has a new feature for generating a QR code to make it easier for customers to join the waitlist while standing outside of a business. All of the Waitlist Me subscriptions include options for businesses to use the Add Yourself Web Widget to let customers join waitlists remotely, and usually customers would access these features from business websites. However, in cases where a customer has already arrived at the business and your staff is unable to greet them in person, adding a QR code to a flyer or sign posted near the front door with some simple instructions can be an easier way to get customers to the web widget and join the waitlist. Using a QR code to open up a link to the web widget in their phone browsers is easier than having them type in the web URL directly. 

The widget can be configured in the settings online by going to Account > Settings > Add Yourself. Once you’ve tailored the options to fit your workflows, generate your unique QR code by using the link at the top of the Add Yourself settings page.

From there, you can print or download your QR code and add it to whatever signage you have for customers. Using the QR code feature can provide a touchless option instead of a sign-in kiosk, or simply save your staff time from needing to enter each customer’s information into the waitlist app.

Tuesday, October 27th, 2020 .

Waitlist Me’s Pro & Platinum subscriptions offer more opportunities to tailor the customer experience to fit your brand image and messaging by allowing custom HTML to be added to key touchpoints. You can customize several of the views customers see when scheduling a reservation or joining the waitlist as well as the views of the public waitlist they can see while waiting and after they have been served.  

Add Yourself – When using the Add Yourself features on the main web widget and kiosk views, you can include a block of HTML to the page to display rich-formatted text and images. On the main view before customers enter the information you might provide information about rules for scheduling, requirements for entering your business, or anything else that might be helpful to customers when joining your waitlist or making a reservation. You can also add different HTML to the confirmation page that customers view after they add their info and submit their request. Helpful information here might include a link to a restaurant’s menu or a store’s catalog, so people can browse and make selections while they wait. 

You can add plain text, HTML, links, and/or pictures. Make changes by logging in to www.waitlist.me and  going to Account > Settings > Add Yourself. In the Main View section, there’s a link for Edit HTML; use this for the main widget view. Further down on the Add Yourself settings page there’s an option for Confirmation & Approval. There you’ll see another link for Edit HTML; use this for the confirmation page.

Public Waitlist Page – When you add customers to the waitlist or they add themselves remotely, there is an option to send them a confirmation text with a link to the Public Waitlist page. Custom HTML can be added to the bottom of this page for customers to view while they wait. Details about sales, links to menus/catalogs, or instructions for signing up for a rewards program could all be a great way to help customers pass the time while they are waiting. 

Public Waitlist Custom HTML Statuses – Once you’ve notified a customer that you’re ready for them, the table view of the public waitlist will no longer be visible and a graphic showing a ‘Ready!’ sign will appear. After customers are checked off the list, they’ll see a ‘Thank You’ picture. Change one or both of these to your own pictures by going to Account > Settings > Public Waitlist > Colors & Custom HTML > HTML Statuses. You can also customize the status text that appears in the boxes at the top of these views. See more details here.

Tip! Custom HTML allows you to include images that are hosted on your website or another location. If you need a service to host your images, we suggest checking out Cloudinary or Imgbb

Full-page Custom HTML Display – For the ultimate options in customization, the Platinum subscription offers the ability to fully re-create the web widget and kiosk views using HTML, CSS and JavaScript. You’ll need a web developer to use these features. You can change all the visual elements of the view while still taking advantage of the structured data elements and key features like the wait estimates. And of course, you can add your personalized branding throughout each screen customers see in the process of joining the waitlist and scheduling reservations. This page has more information on these options.