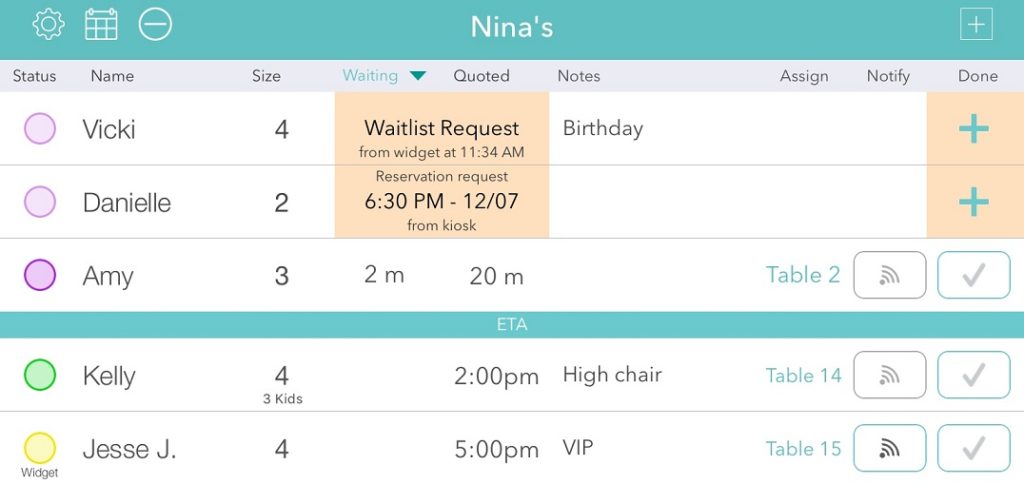
We’ve added some new features and UI improvements to help manage customer requests made from your website or social media page if you are using the Waitlist Me web widget. When a request is received, you’ll be able to see more information in the waitlist view about what it is for and where it came from. The entries appear at the top of the waitlist and will flash orange. If you’re on the Reservation or Resource Management view, a quick pop up will alert you to the new request.
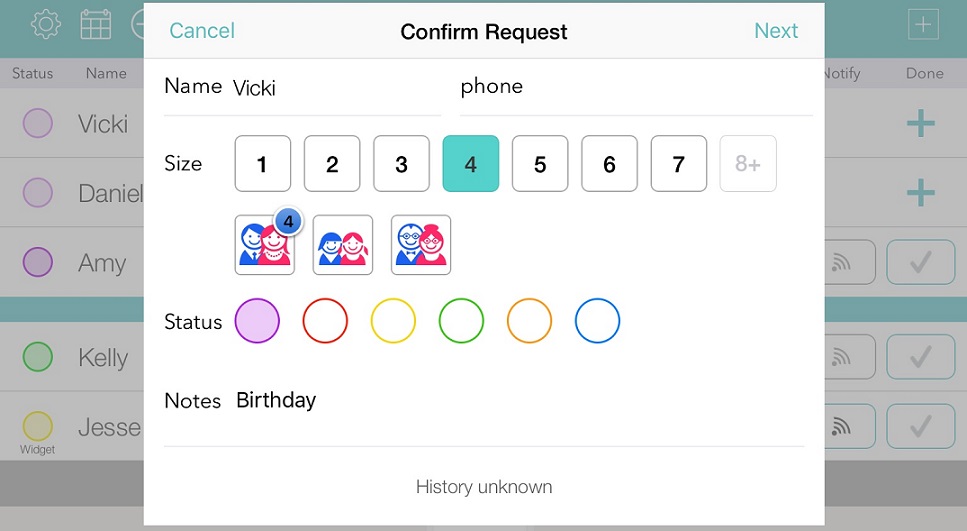
For waitlist requests, you can see all the key information about the customer request such as name, group size, and any notes the customer added. Simply press on the row to accept the request, and move through the same steps you’d normally take to add customers to the list, but with the information the customer entered already pre-populated. You can also change the status color, assign a resource, and add any notes you need for your own reference. Then chose an estimated wait as the final step. Accepting reservation requests work similarly, with the added benefit of when you press on the row, it will show the request in the context of that day’s list of reservations to see if you have availability.
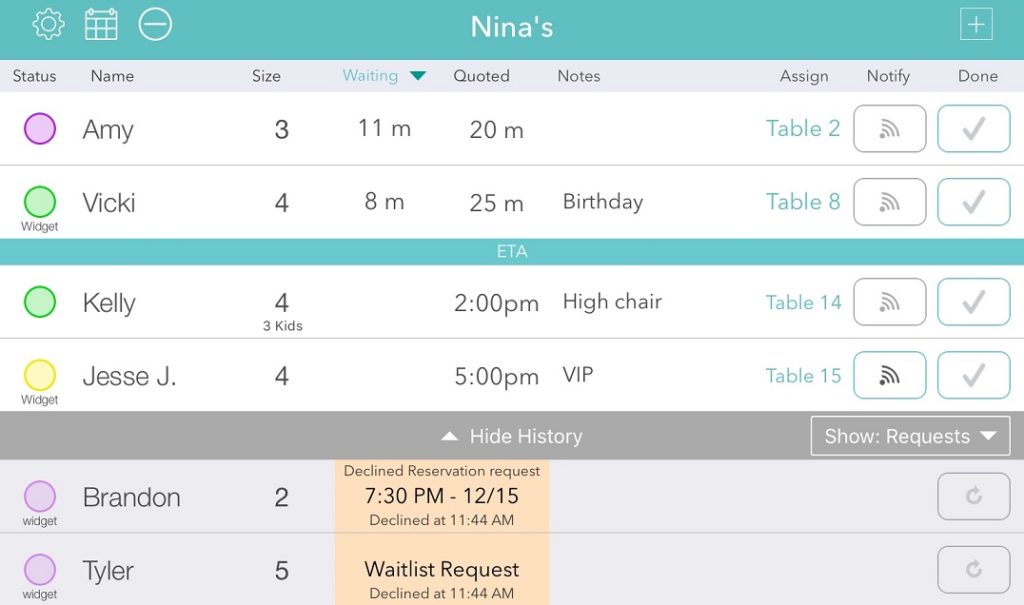
If a request was accidentally rejected, you can still see it in the History section by tapping on the “Show History” bar at the bottom of the waitlist. The History section also has some filters on the right side that can be used to show customers that have been served and removed from the waitlist in addition to rejected requests. Use the return arrow button on the right to accept a previously rejected request.