Whether you’re using the Waitlist Me web widget to let customers self-schedule or your team is entering reservations or appointments for customers, there are some optimizations you can make in your settings to get the most out of the scheduling features.
If you plan to use the widget, on the Waitlist Me website go to Account > Settings > Add Yourself. The Main View section has a feature called Time Increments, which will control how frequently the time selection option shows reservation slots to customers. You can choose every 5, 10, 15, 30 or 60 minutes. (If you haven’t started using your widget yet, also see this page for the basic setup information.)
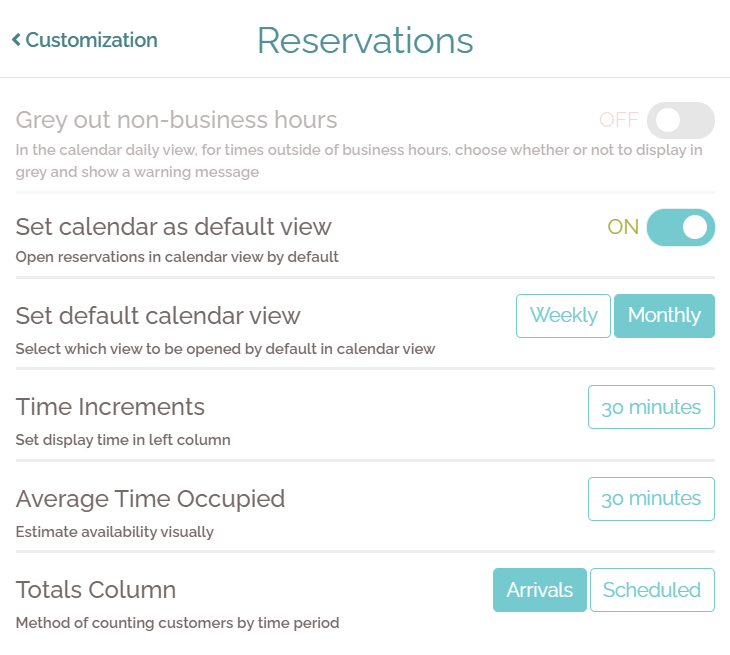
Click Waitlist at the top to go to the main waitlist page, then click on the settings gear icon and choose Reservations. You can customize the time increments you want displayed on your calendar view and the average time a table or resource is occupied. Based on these settings you can block out your reservation availability visually in your calendar view.
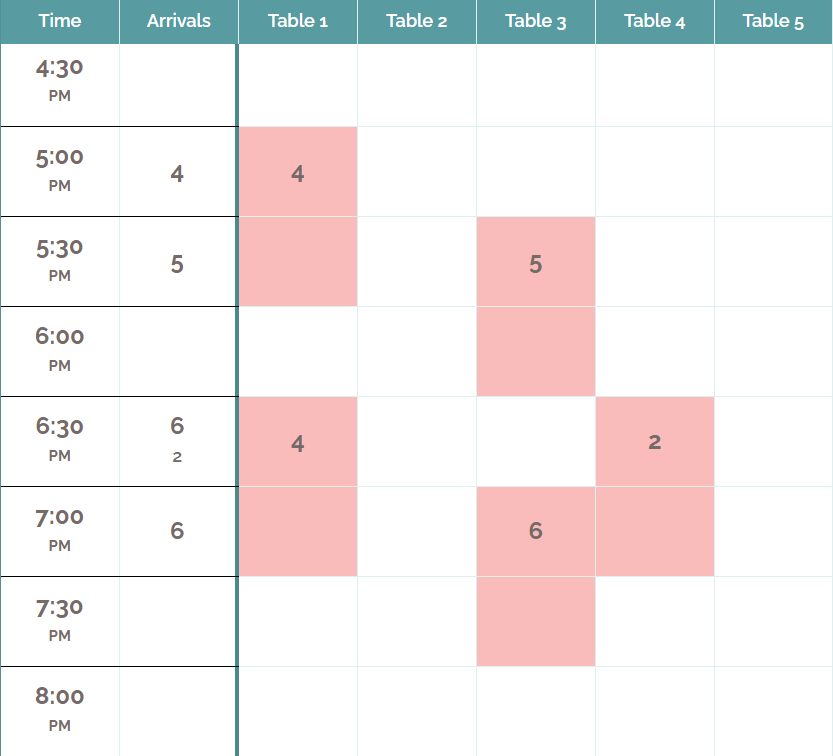
Choose to show tables as occupied either by how many parties will be arriving in a time block or by how many parties are expected to be currently seated in the time block. The Arrivals option shows the total number of people arriving, with the number of groups in smaller font below if more than one group is arriving in that time block:
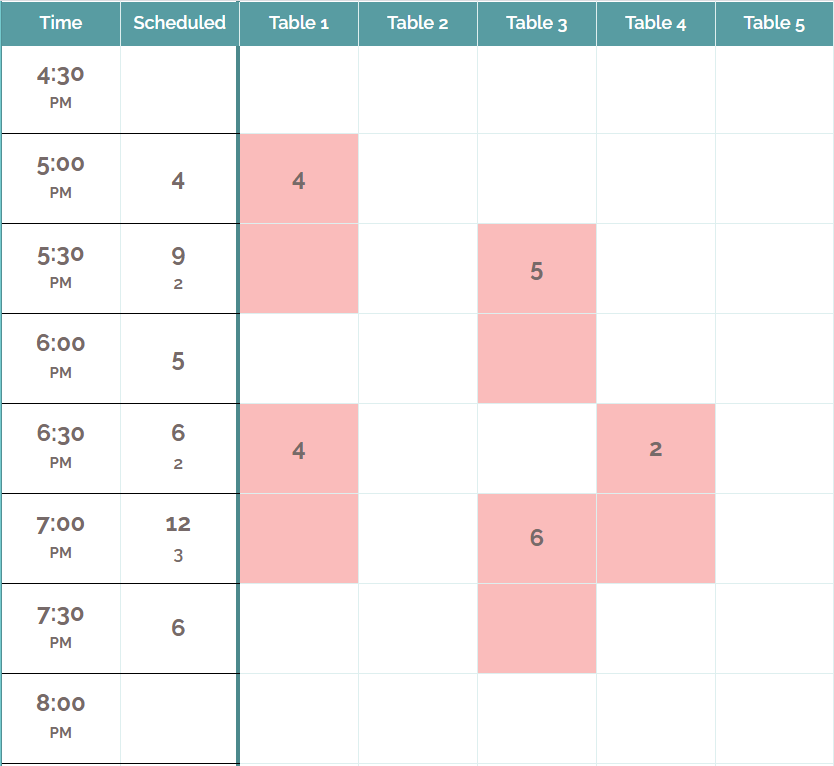
The Scheduled option shows the total number of people and groups being served, regardless of when they arrived:
Some settings (including many view settings) are device-specific. These settings for how you prefer to view reservations would also need to be set on tablets you plan to use. In the tablet you can navigate to the calendar and press in any time block to see an additional option on the upper right for changing views.
A Waitlist Me Pro or Platinum subscription offers more controls for scheduling. You can set up party size limits by going to Account > Settings > Add Yourself > Input Fields. Under Size Limits, select reservations, waitlist, or both. Then you’ll see the option for minimums and maximums. There are also more scheduling features available with Business Hours, Display Hours, Scheduling Rules, and Blackout Dates. Please see this page to walk through these features.